Modeling Pubic Bones for 3D Printing Pt. 1: Grayscale Model Maker in Slicer
Here is a tutorial for the Grayscale Model Maker in the free program Slicer, specifically for modeling pubic bones since they are used in anthropology for age and sex estimation. The Grayscale Model Maker is very quick and easy!
And I can't stand the "flashing" in the Editor.
For this example, I am using a scan from TCIA, specifically from the CT Lymph Node collection.
Slicer Functions used:
- Load Data/Load DICOM
- Volume Rendering
- Crop Volume
- Grayscale Model Maker
- Save
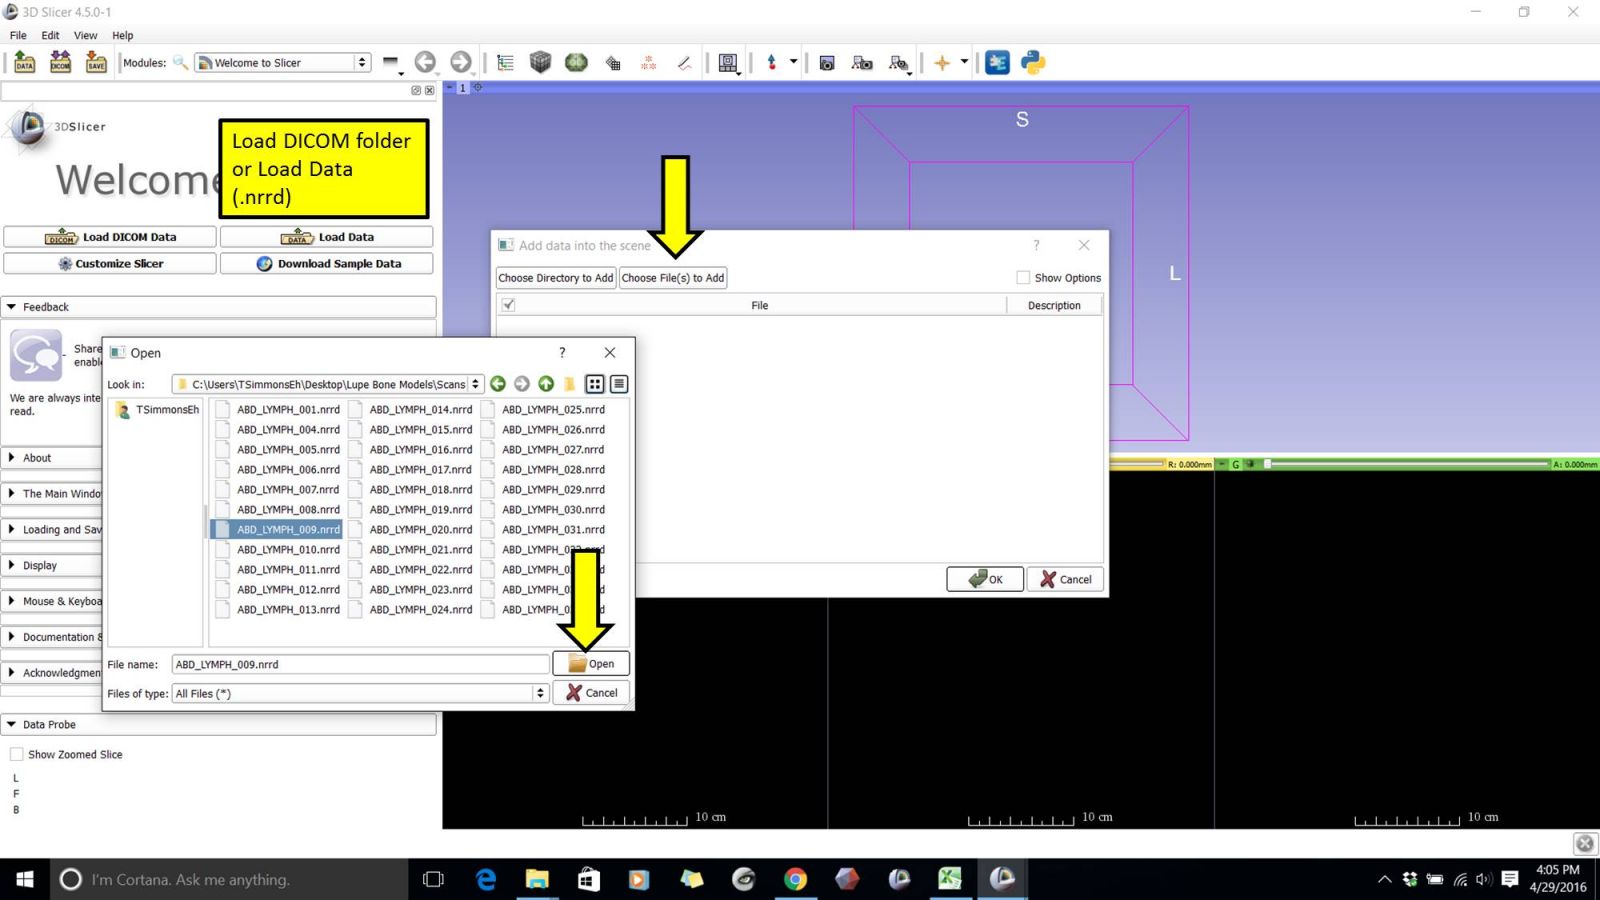
Load a DICOM directory or .nrrd file.
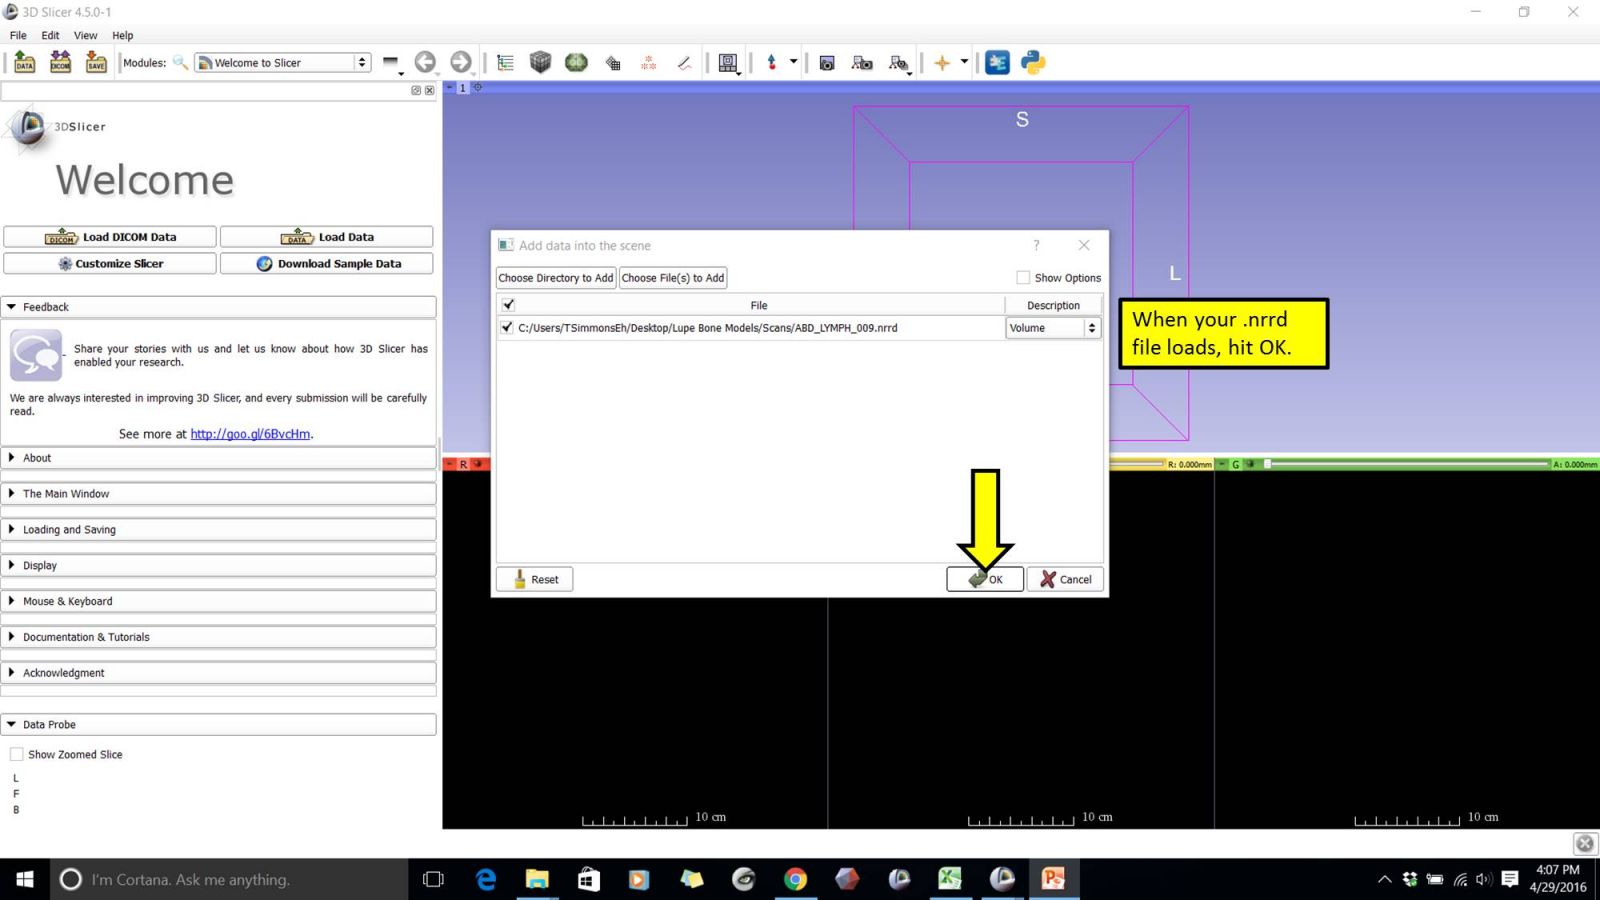
Hit Ok.
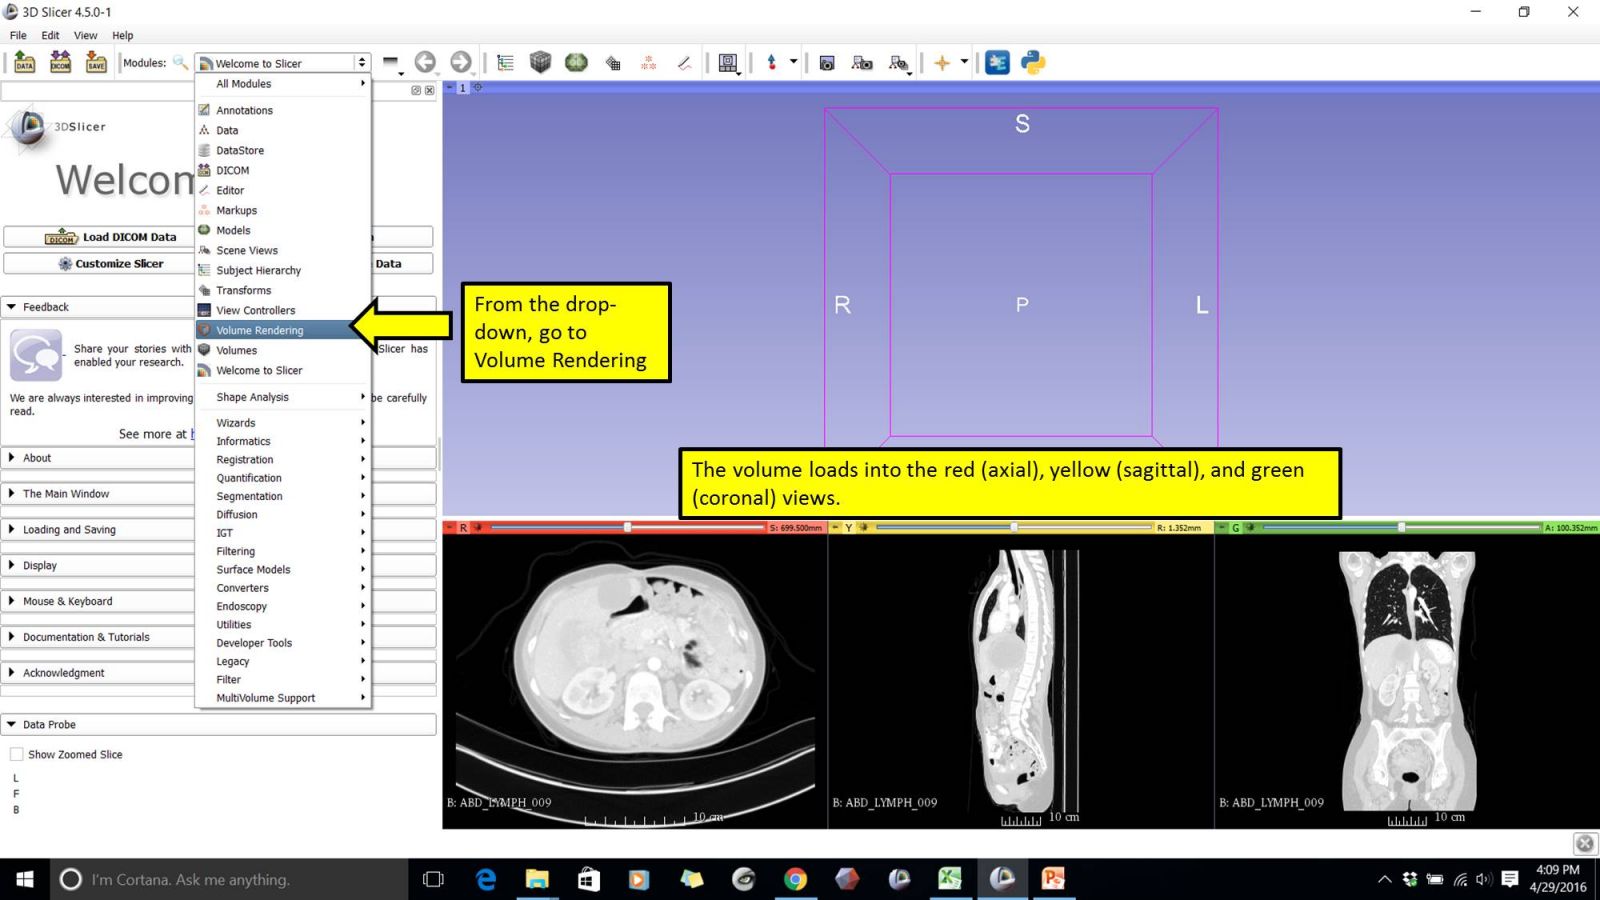
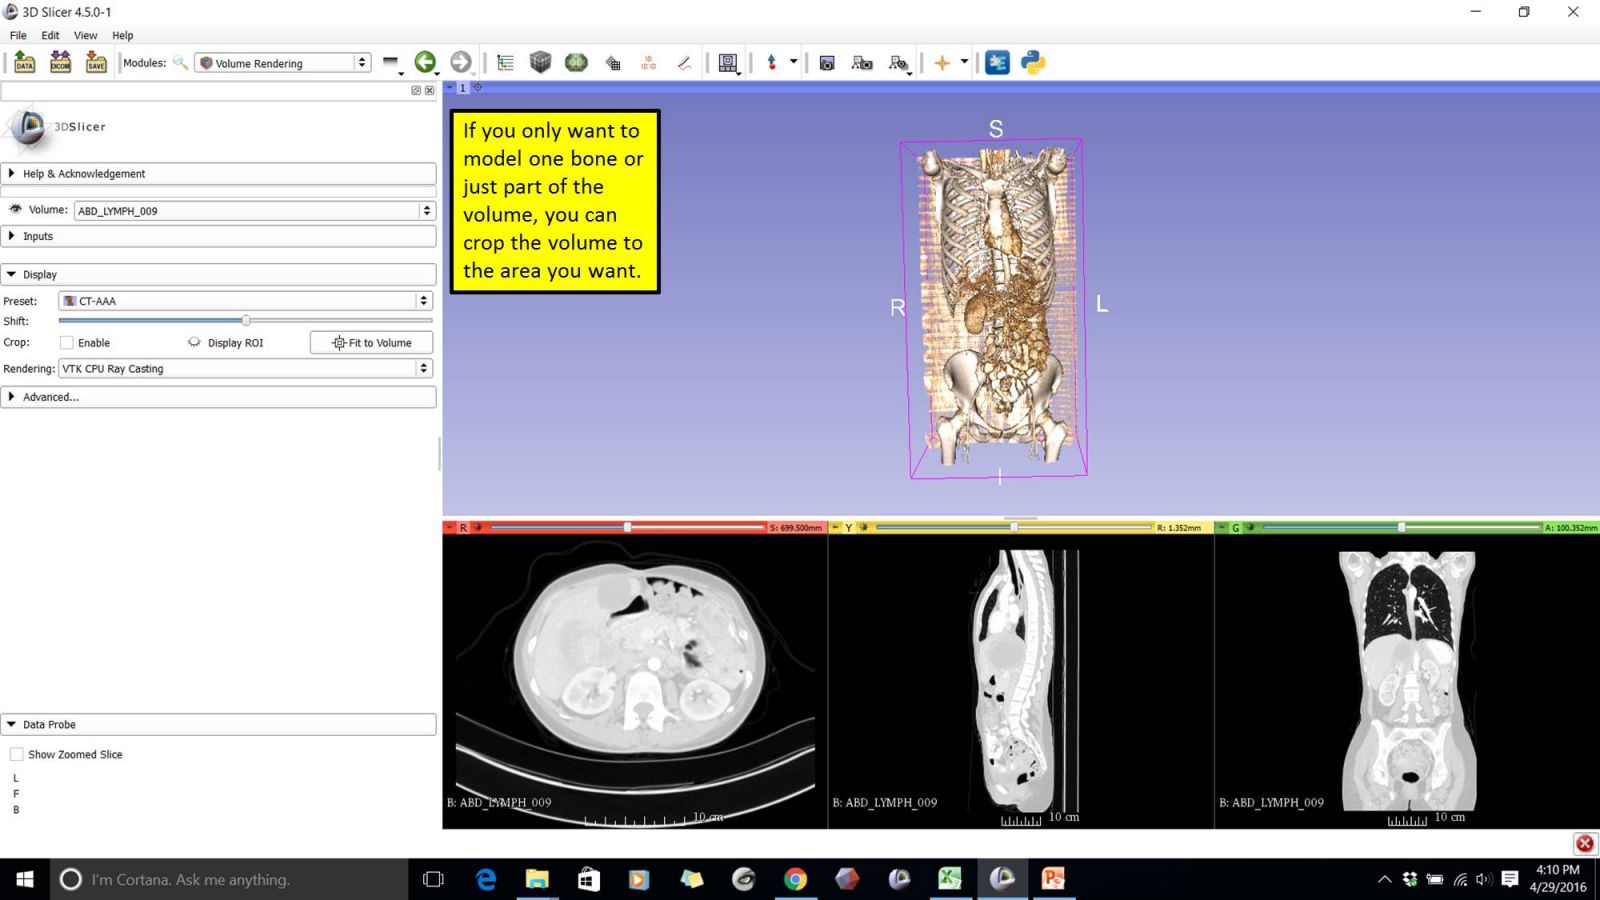
Make sure your volume loads into the red, yellow, and green views. Select Volume Rendering from the drop-down.
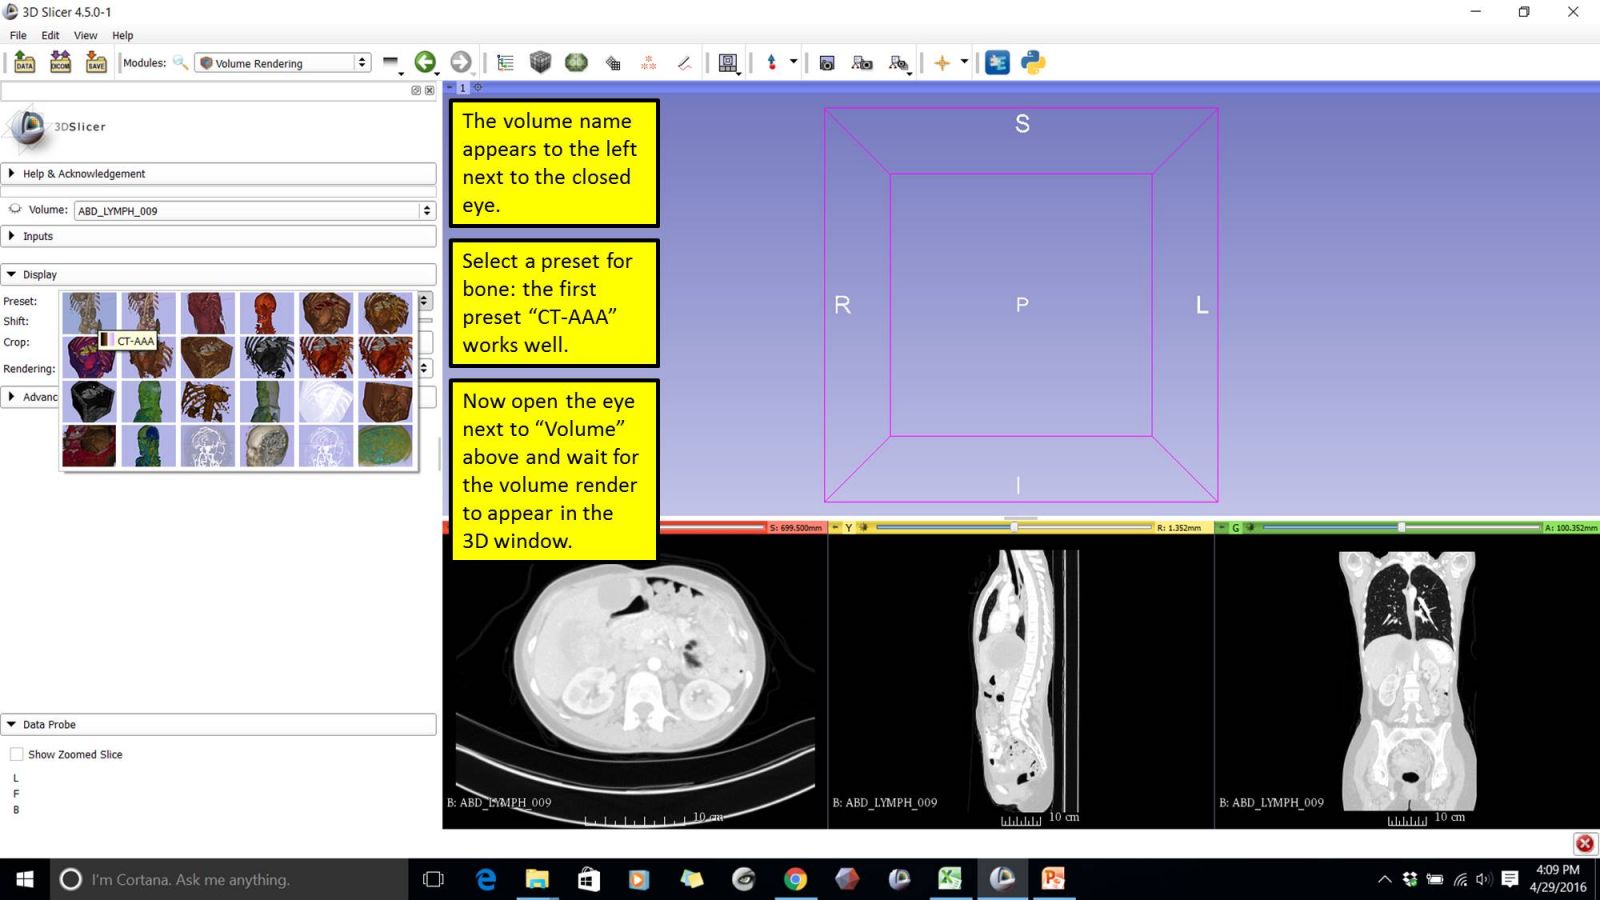
Select a bone preset, such as CT-AAA. Then click on the eye next to "Volume."
...Give it a minute...
Use the centering button in the top left of the 3D window to center the volume if needed. Since we only want the pubic bones, we will use the ROI box and Crop Volume tools to isolate that area.
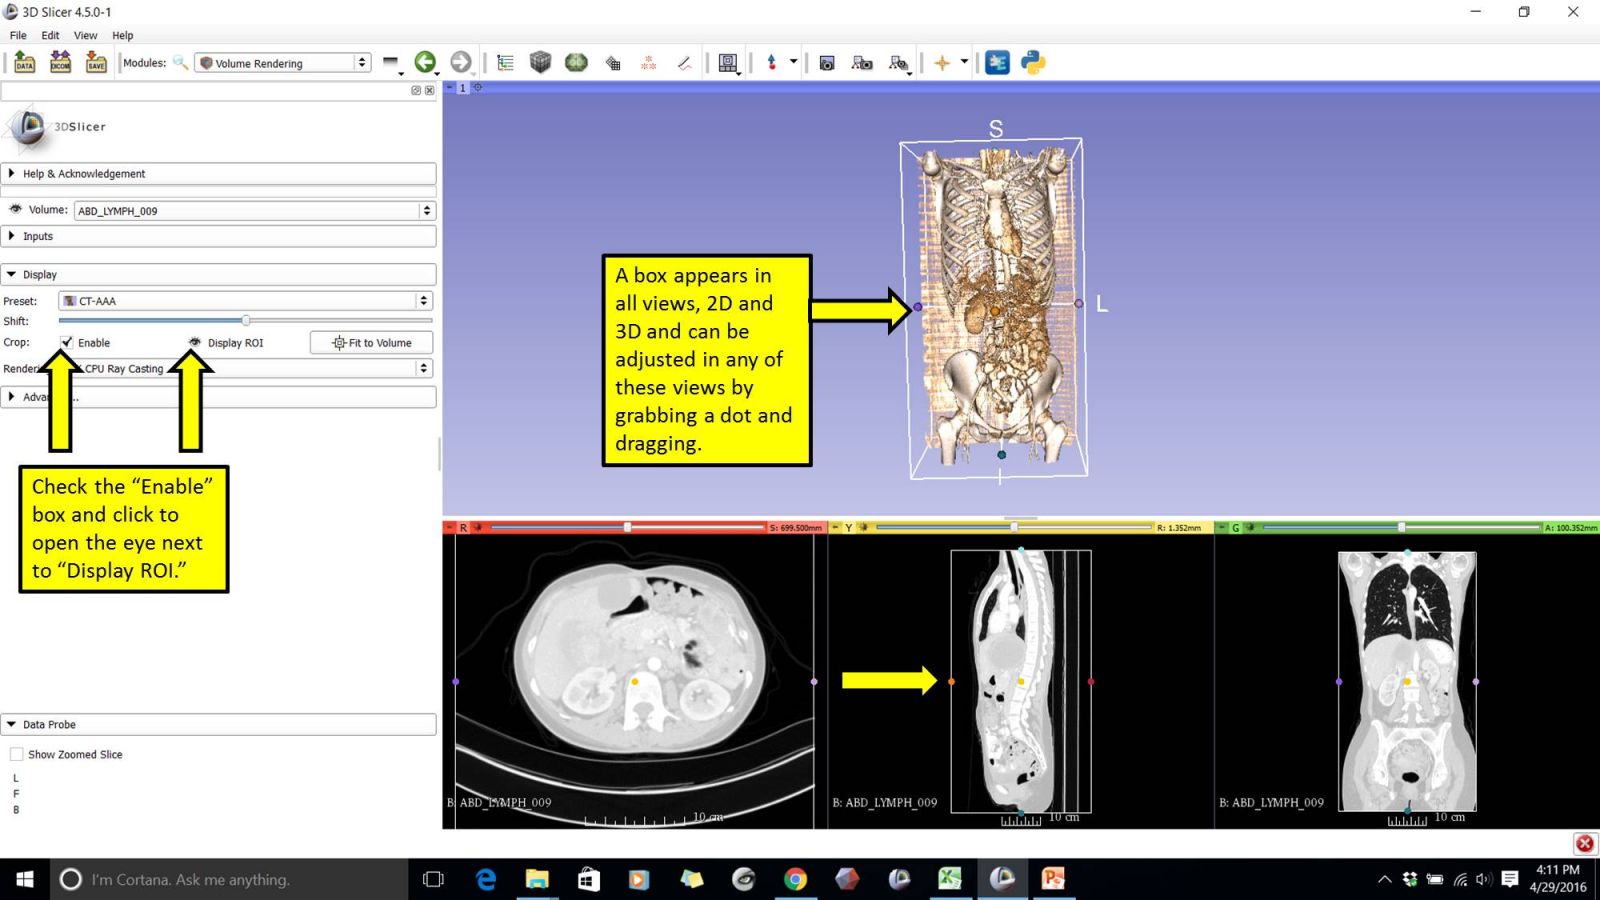
To crop the volume check the "Enable" box next to "Crop" and click on the eye next to "Display ROI" to open it. A box appears in all 4 windows. The spheres can be grabbed and dragged in any view to adjust the size of the box. The 3D view is pretty handy for this so you can rotate the model around to get the area you want.
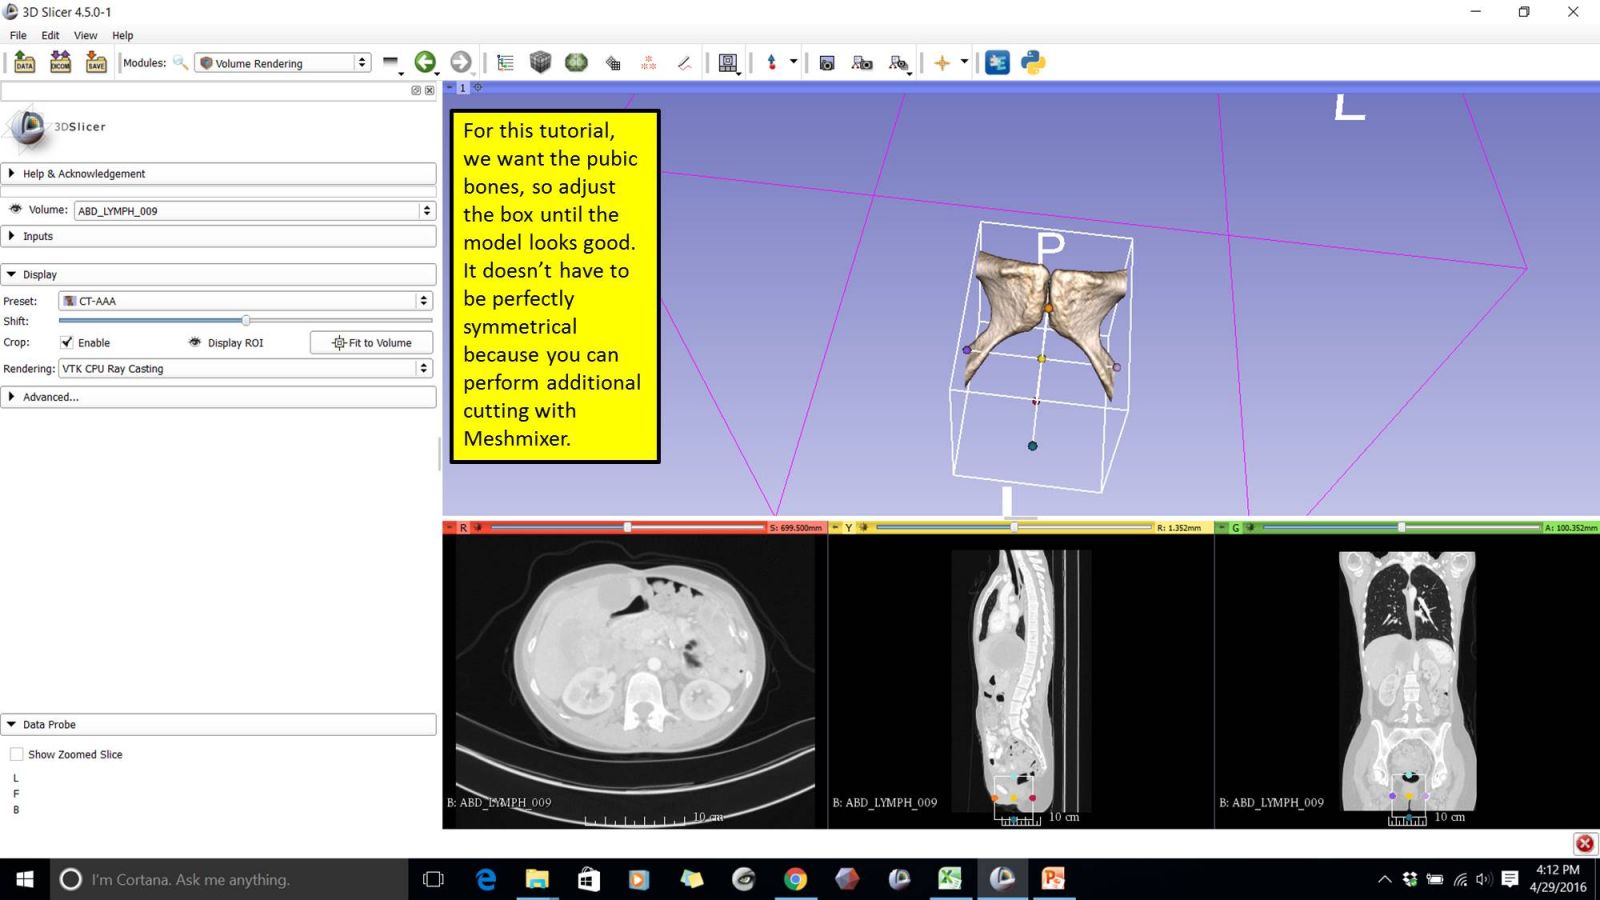
The model itself doesn't have to be perfectly symmetrical because you can always edit it later. Once you like the ROI, we can crop the volume.
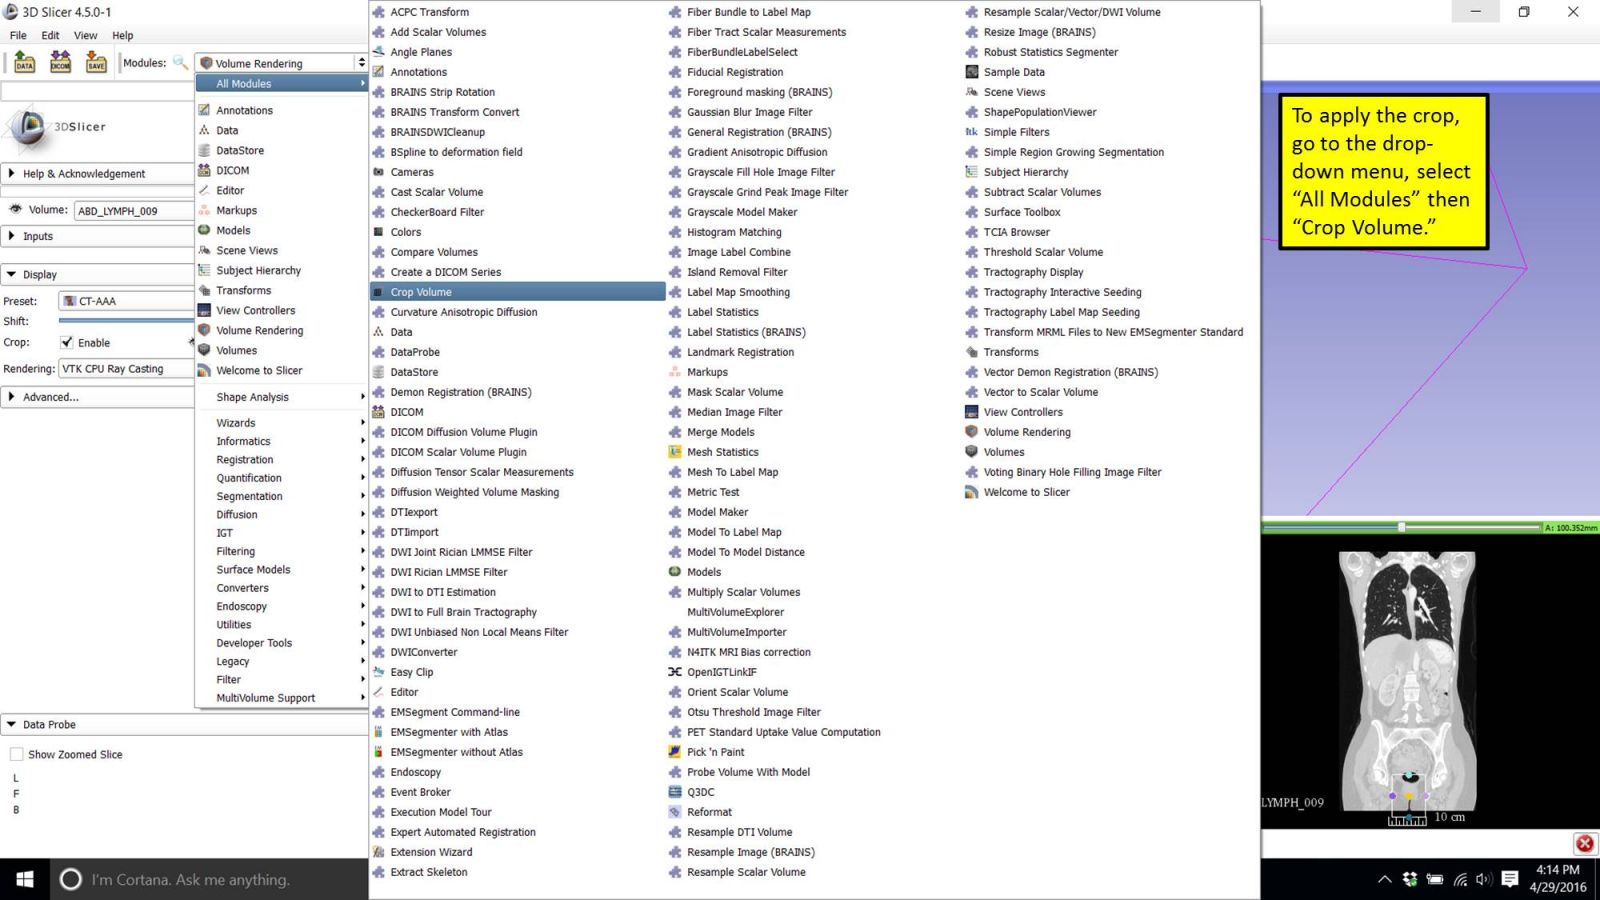
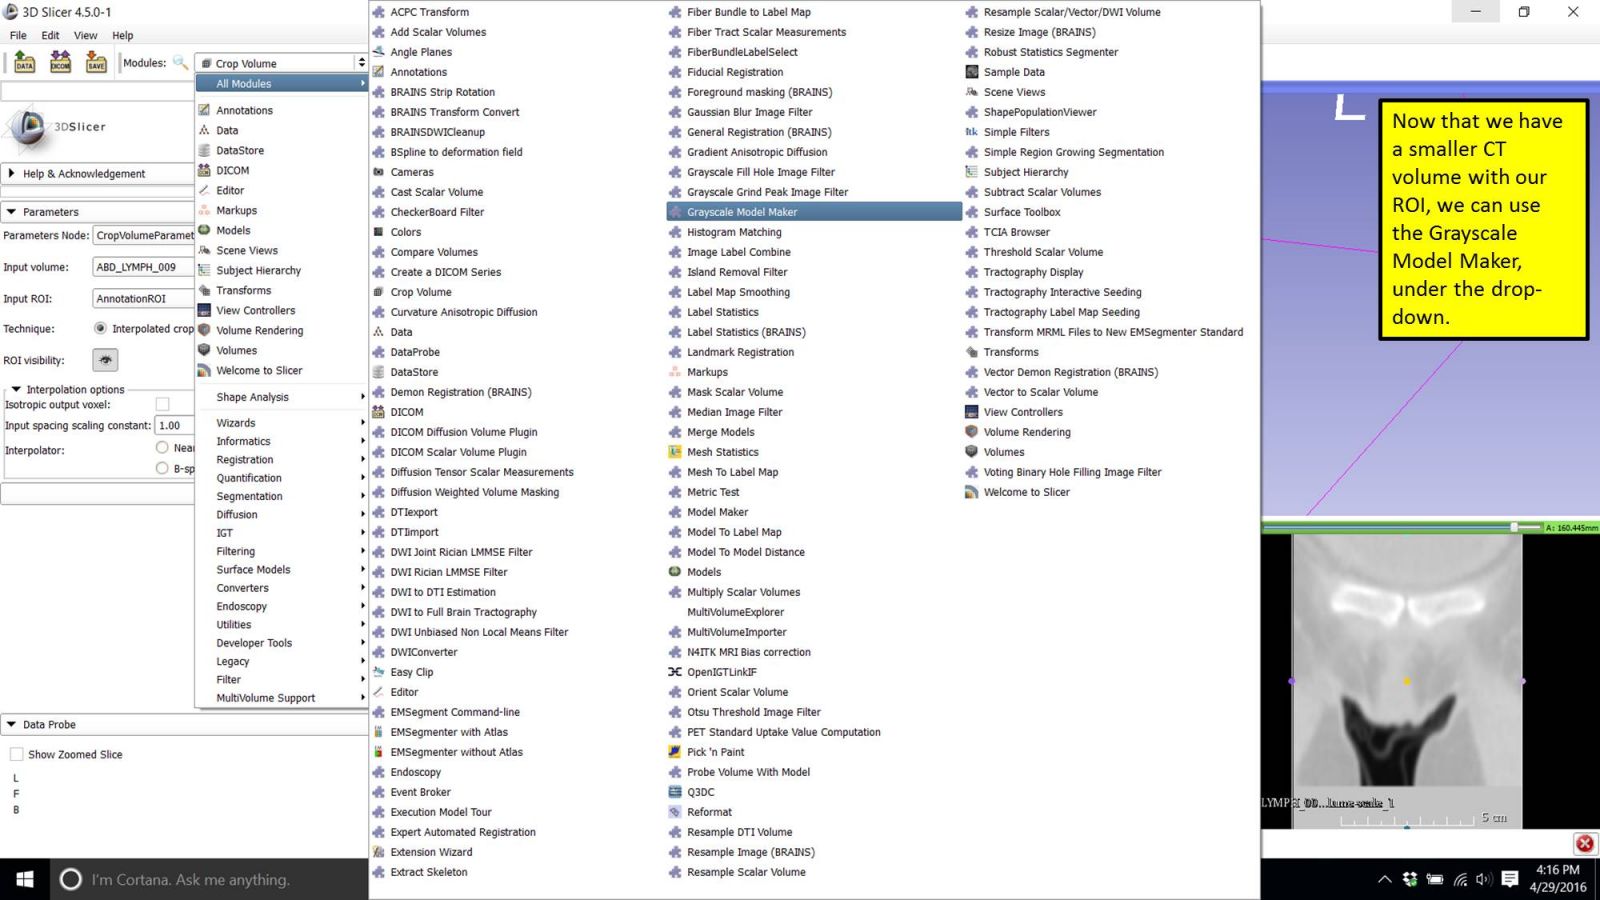
To crop the volume, go to the drop-down in the top toolbar, select "All Modules" and navigate to "Crop Volume."
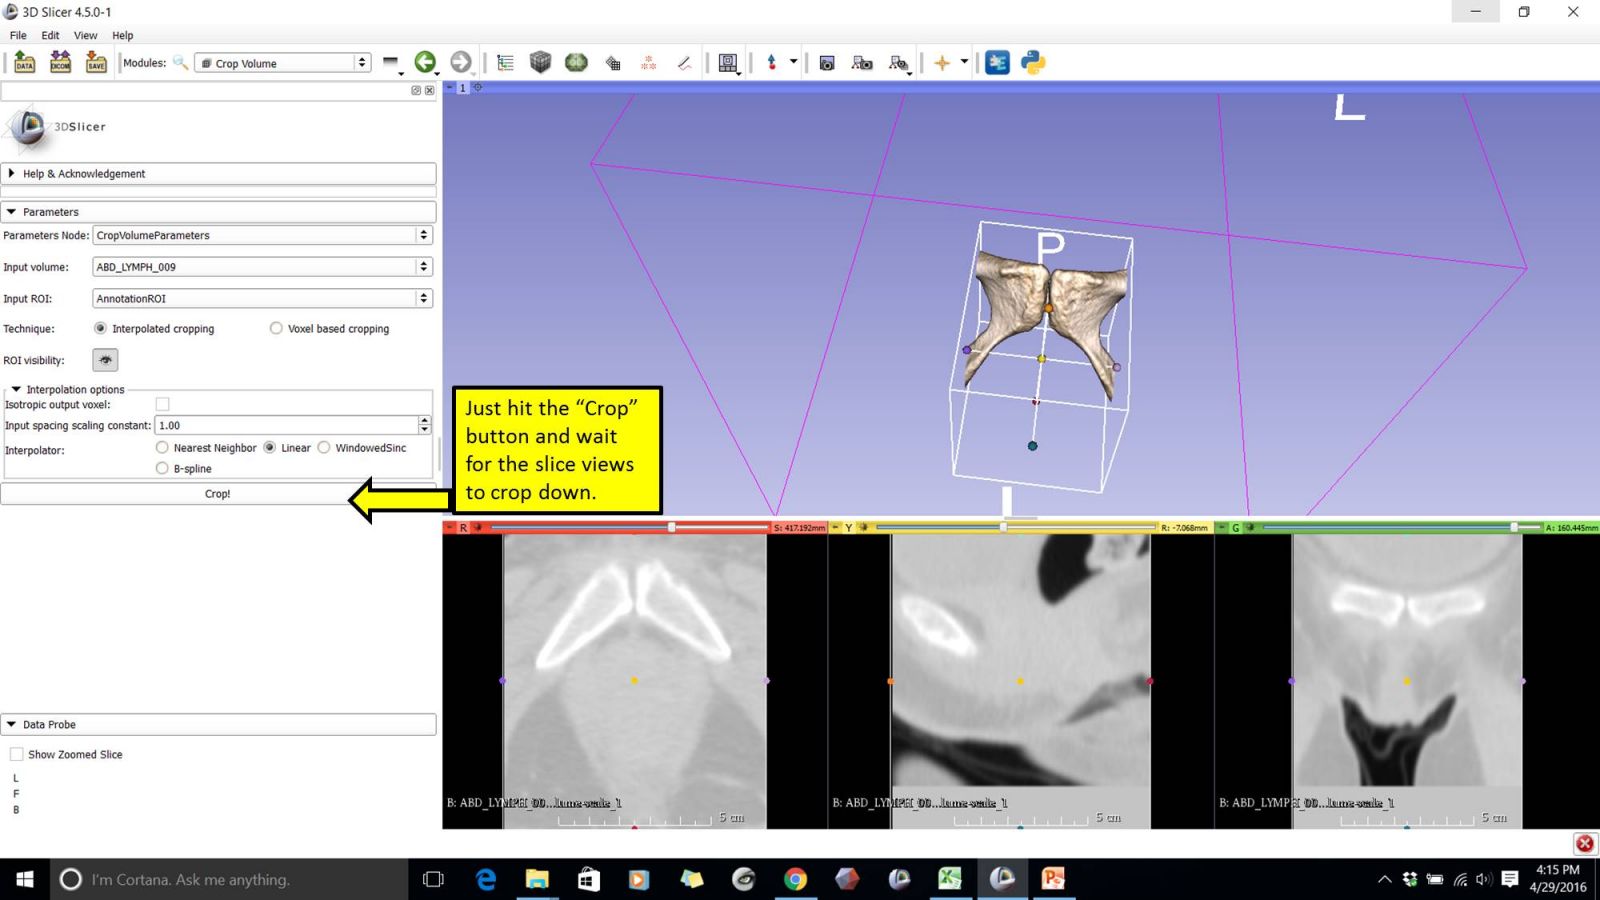
Once the Crop Volume workspace opens, just hit the big Crop button and wait. You won't see a change in the 3D window, but you will see your slice views adjust to the cropped area. At this point, you can Save your subvolume that you worked so hard to isolate in case your software crashes! Select the Save button from the top left of the toolbar and select the .nrrd with "subvolume" in the file name to save.
Now we will use the All Modules dropdown to open the Grayscale Model Maker. If you want to clear the 3D window of the volume rendering and ROI box, you can just go back to Volume Rendering, uncheck the Enable box and close the eyes for the Volume and ROI.
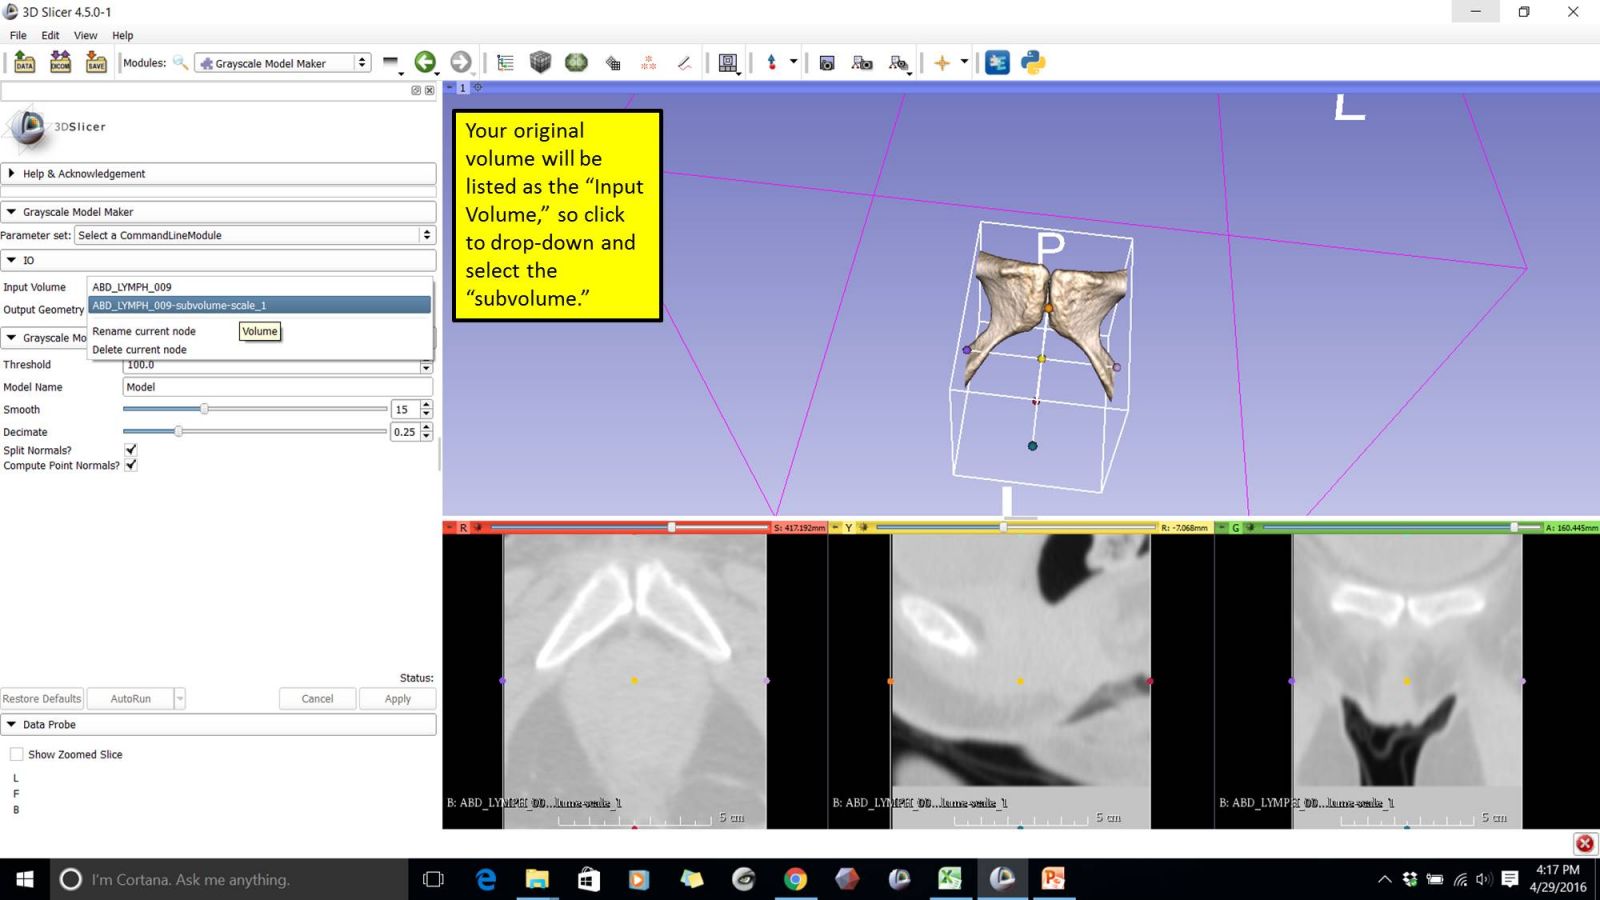
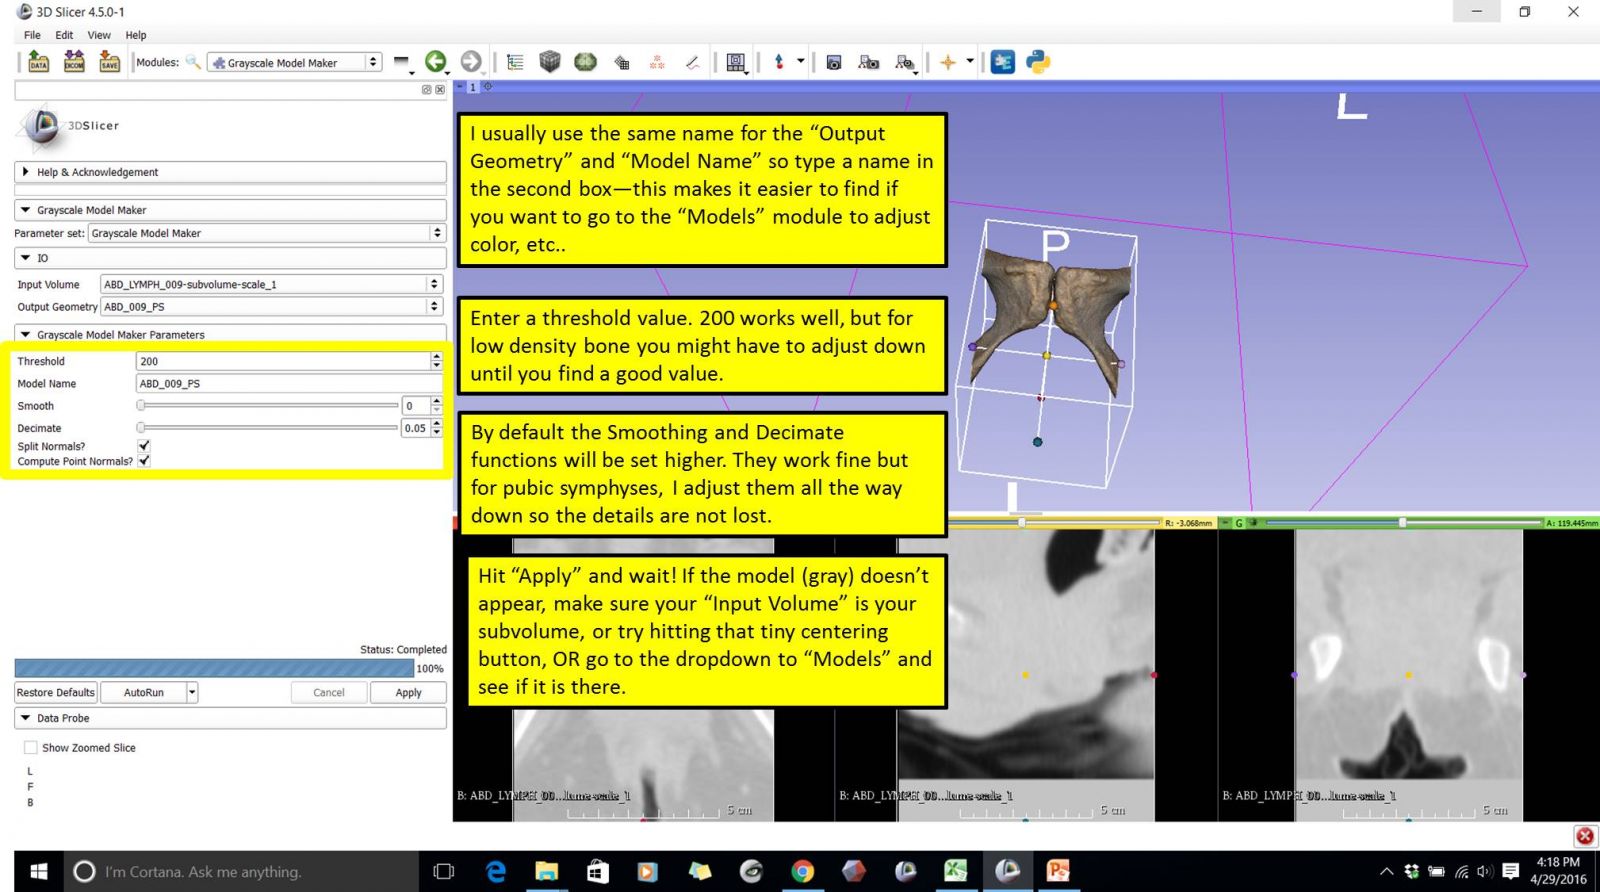
When using the Grayscale Model Maker, the only tricky thing here is to select your "subvolume" from the "Input Volume" list, otherwise your original uncropped volume will be used.
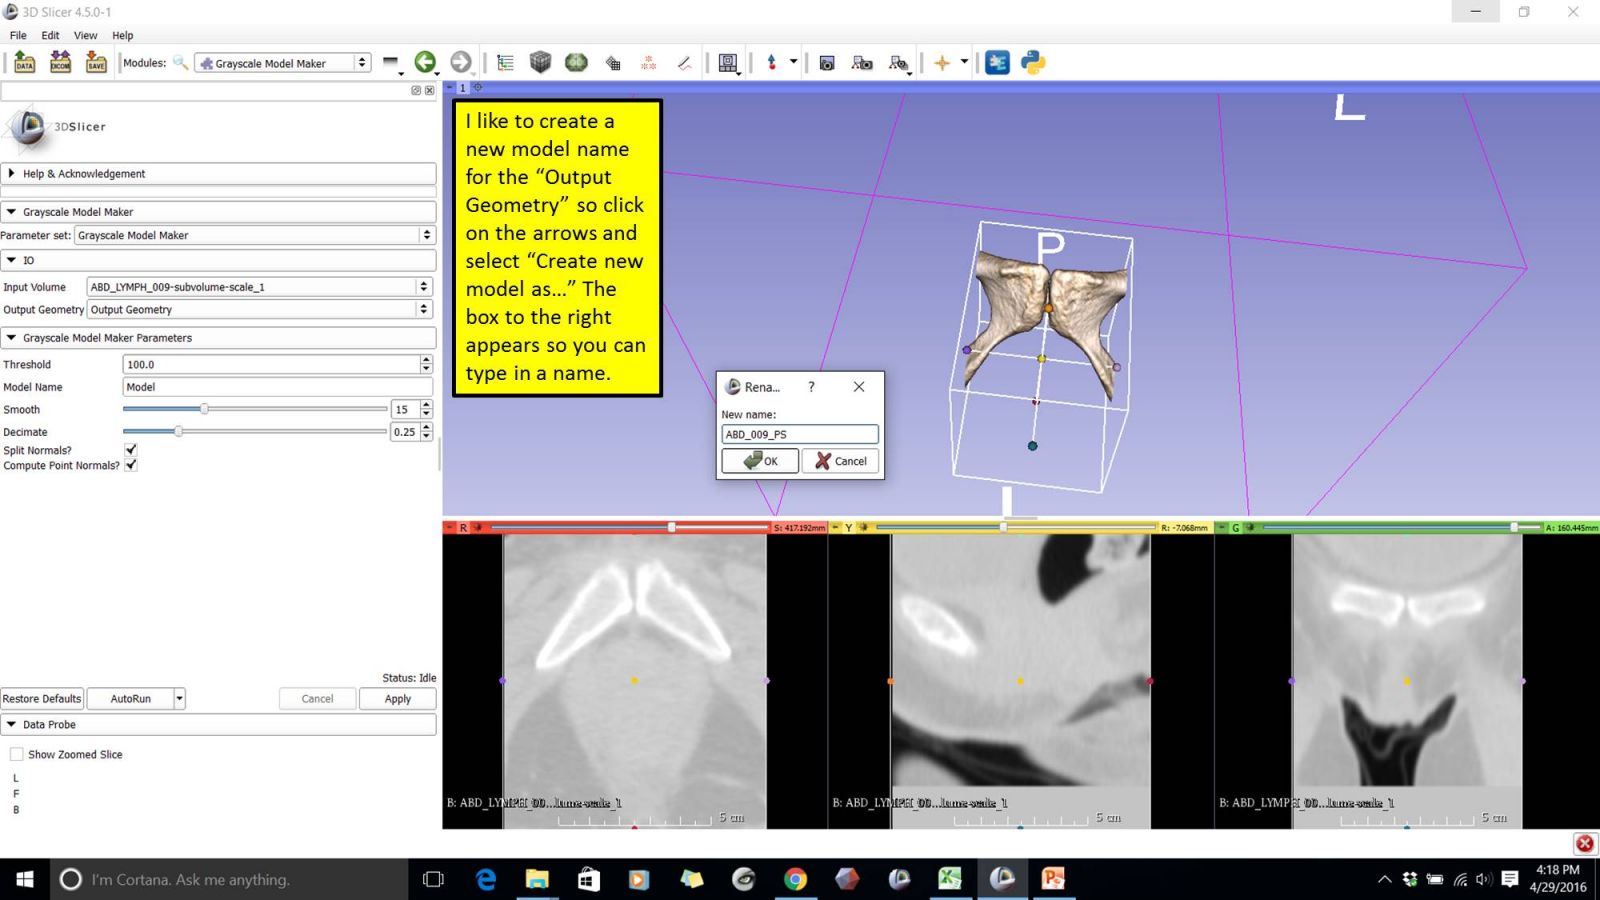
Click on the "Output Geometry" box and select "Create a new Model as..." and type in a name for your model.
Now move down to "Grayscale Model Maker Parameters" in the workspace.
I like to enter the same name for my Output Geometry into the "Model Name" field.
Enter a threshold value: 200 works well for bone, but for lower density bone, you might need to adjust it down. Since the Grayscale Model Maker is so fast, I usually start with 200 and make additional models at lower values to see which works best for the current volume.
***Here is where I adjust settings for pubic bones in order to retain the irregular surfaces of the symphyseal faces.***The default values for the Smoothing and Decimate parameters work well for other bones, but for the pubic symphyses, they tend to smooth out all the relevant features, so I slide them both all the way down.
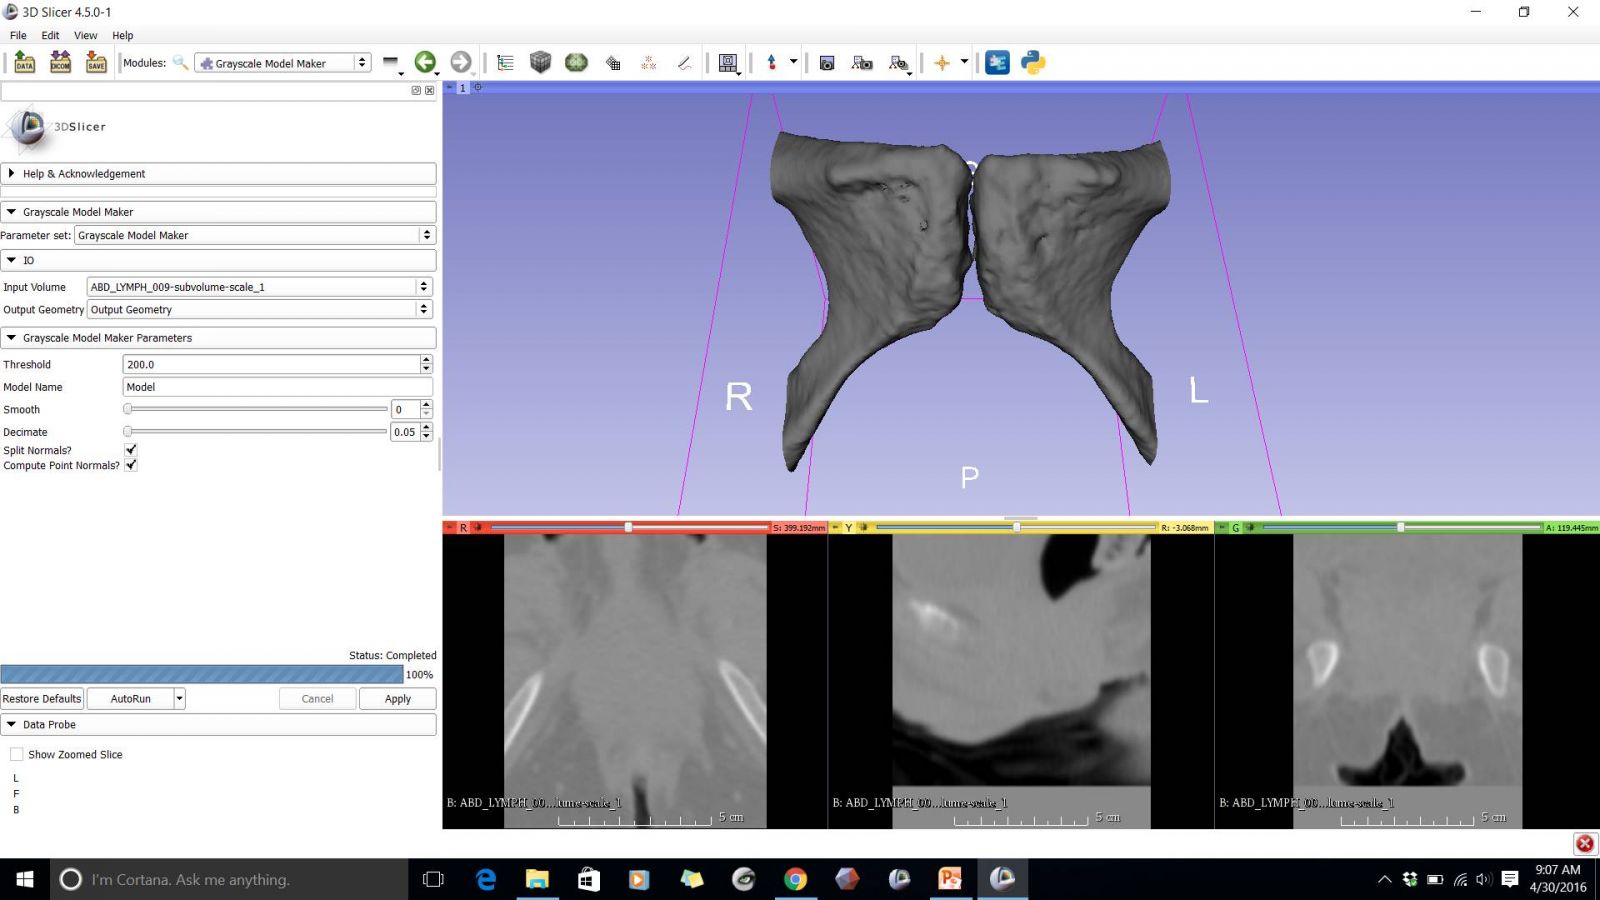
Then hit Apply and wait for the model to appear in the 3D window (it will be gray).
You can see from the image above that my model is gray, but still has the beige from the Volume Render on it since I didn't close the Volume Rendering.
If for some reason you don't see your model: 1) check your Input Volume to make sure your subvolume is selected, 2) click on that tiny centering button at the top left of your 3D window, or 3) go to the main dropdown and go to "Models." If the model actually generated, it will be there with the name you specified, but sometimes the eye will be closed so just open it to look at your model.
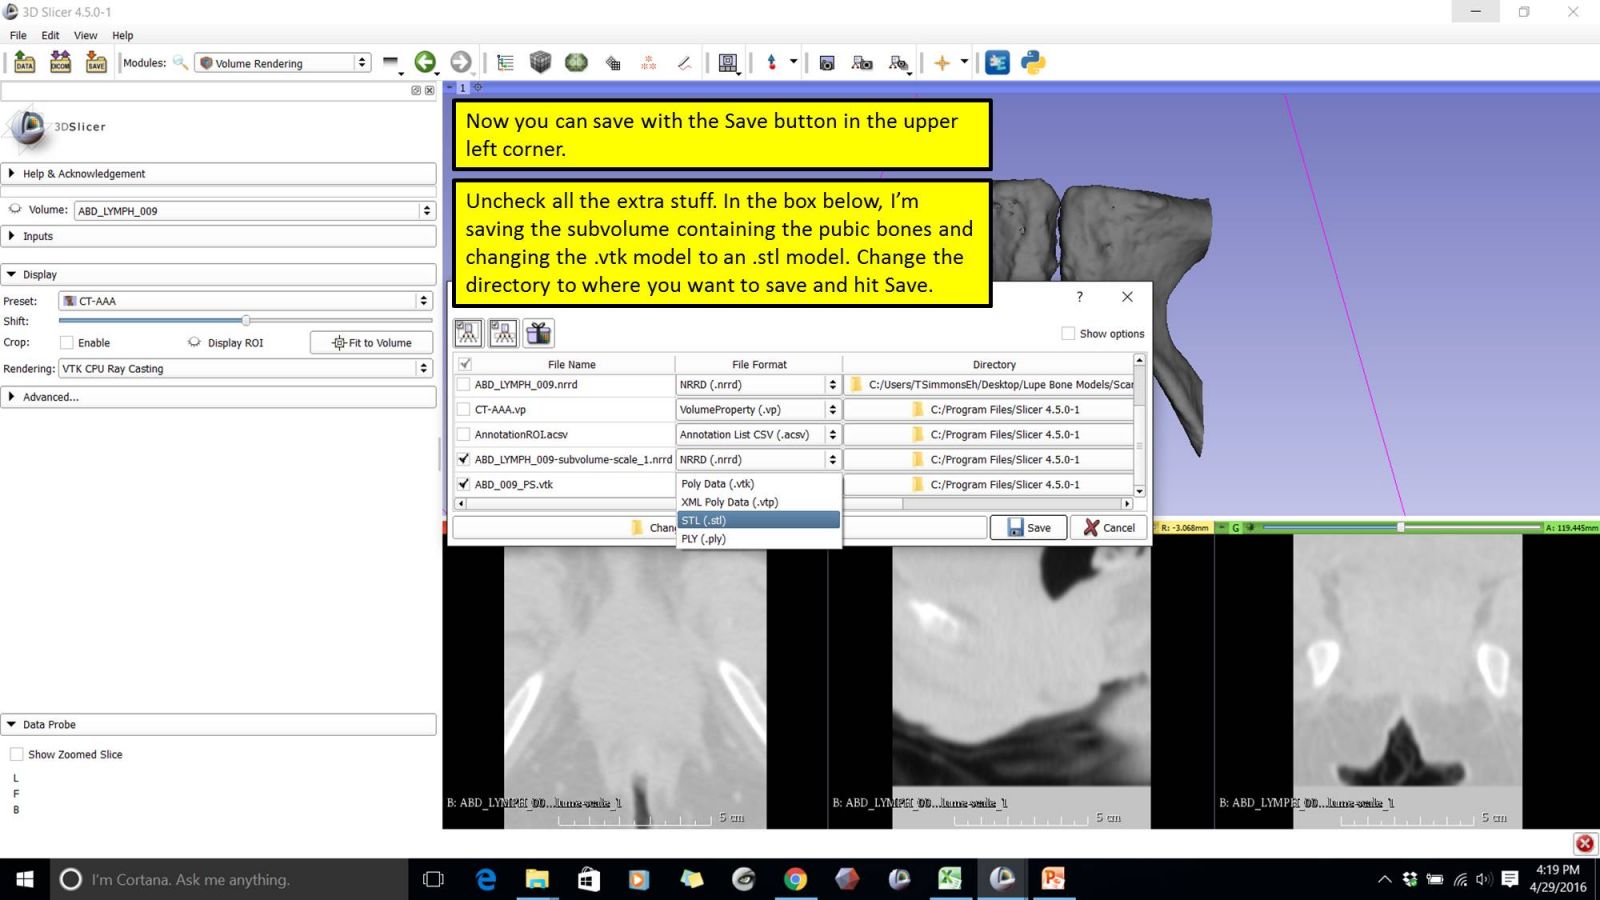
Now we an save your subvolume and model using the Save button in the top left of the main toolbar. You can uncheck all the other options and just save the subvolume .nrrd and adjust the file type of your model to .stl. Click on "Change Directory" to specify where you want to save your files and Save!
This model still needs some editing to be printable, so stay tuned for Pt. 2 where I will discuss functions in Meshlab and Meshmixer.
Thanks for reading and please comment if you have any issues with these steps!





4 Comments
Recommended Comments
Create an account or sign in to comment
You need to be a member in order to leave a comment
Create an account
Sign up for a new account in our community. It's easy!
Register a new accountSign in
Already have an account? Sign in here.
Sign In Now