


Entry posted by Terrie S ·
5,161 views
Here is another tutorial on hollowing meshes, specifically head meshes to obtain a face shell, but I use this method to hollow out bones as well.
Dr. Mike recently posted a great video tutorial on hollowing a head using Meshmixer: https://www.embodi3d.com/blogs/entry/359-how-to-create-a-hollow-shell-from-a-medical-stl-file-using-meshmixer/.
I tend to go back and forth between Meshmixer and Meshlab for different functions to prep a print, but I like to use Meshlab for hollowing because it's quick and you can easily control how much "external" surface is selected, which is especially handy for models that have highly complex internal structures.
Note that this workflow is also useful if you simply want a 3D model (for viewing/interacting in software, Sketchfab) of a smaller file size where you don't need the internal structures and/or you don't want to decimate the model to achieve a smaller file size.
Here are the steps to hollow a head model in Meshlab. I will post screeshots below which you can also find in the Gallery, https://www.embodi3d.com/gallery/album/73-hollowing-skin-model-with-meshlab/.
Step 1:
Import a model into Meshlab.
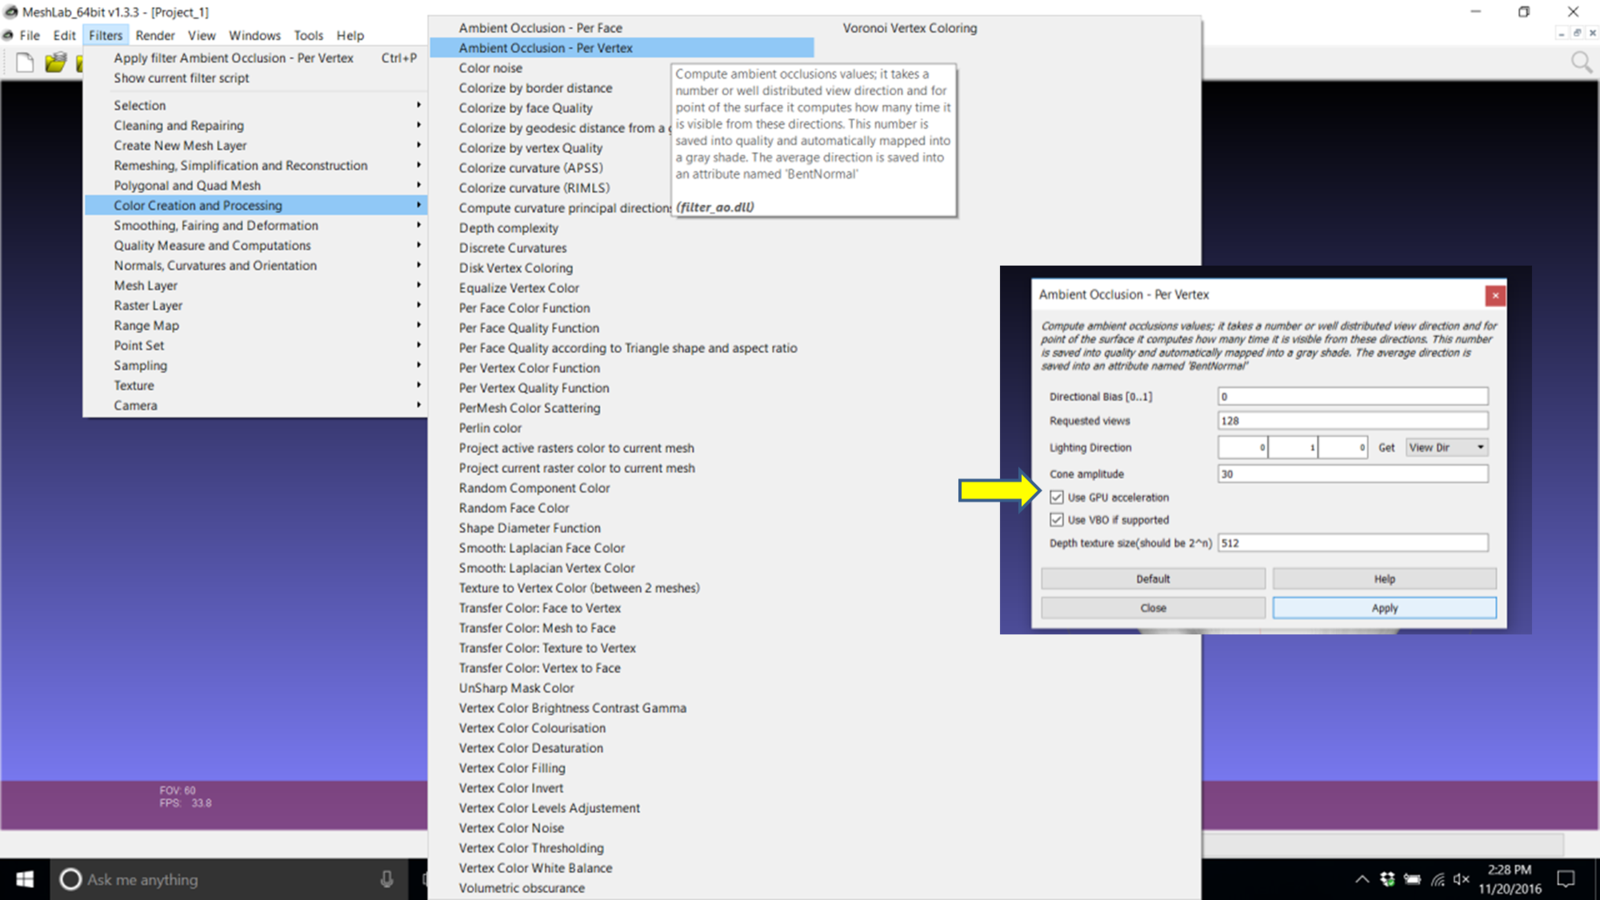
Go to Filters --> Color Creation and Processing --> Ambient Occlusion per Vertex.
When the new box opens, check the box to select "Use GPU Acceleration" and click "Apply." The default settings are fine for a first step.
Once you become comfortable with the workflow, you can play around with applying the light from different axes: "Lighting Direction" and "Directional Bias".
Step 2:
You will notice that your model is now colorized from light to dark, with "deeper" areas shaded darker.
On the main toolbar, select the "transparent wireframe" view.
You can now see the internal structures that are shaded completely black.

Step 3:
We can now use the shading values to select the areas we want to remove.
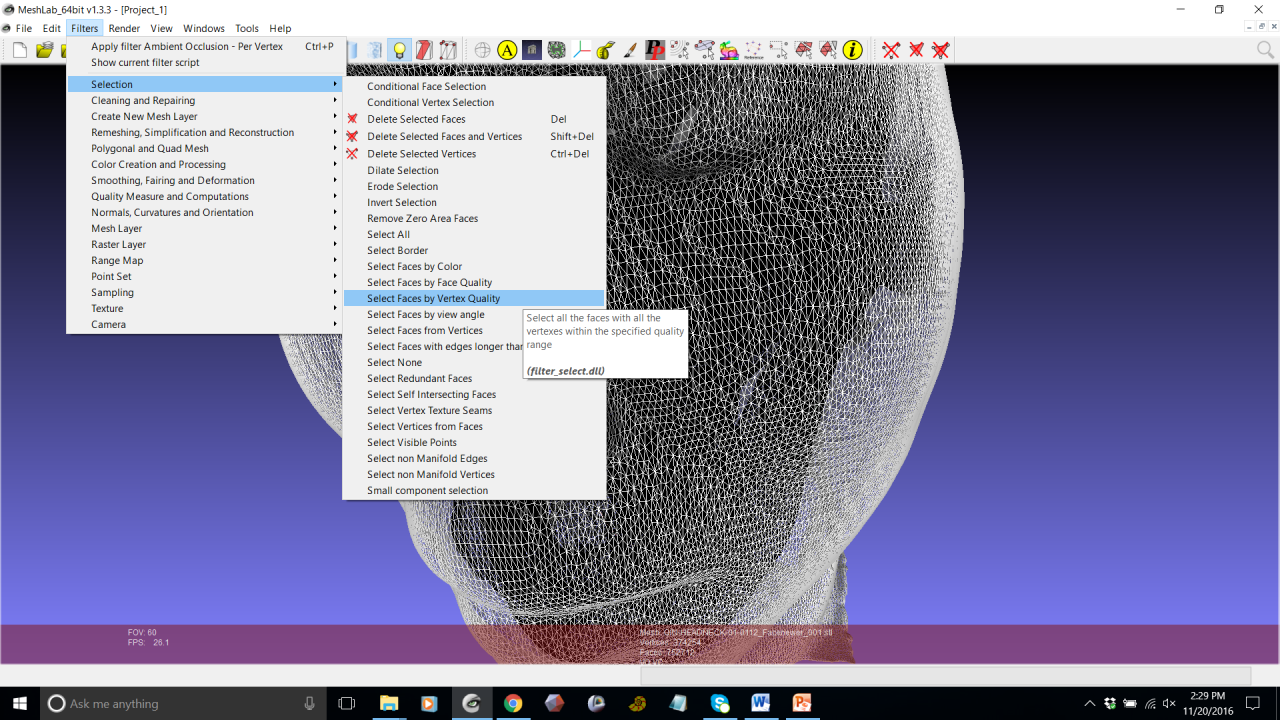
Go to Filters --> Selection --> Select Faces by Vertex Quality. The shading values are stored in the Vertex Quality field of your 3D model, with values from 0 (black) to 1 (white), so we can use these values to select the dark (internal or deep) areas we want to remove.
Step 4:
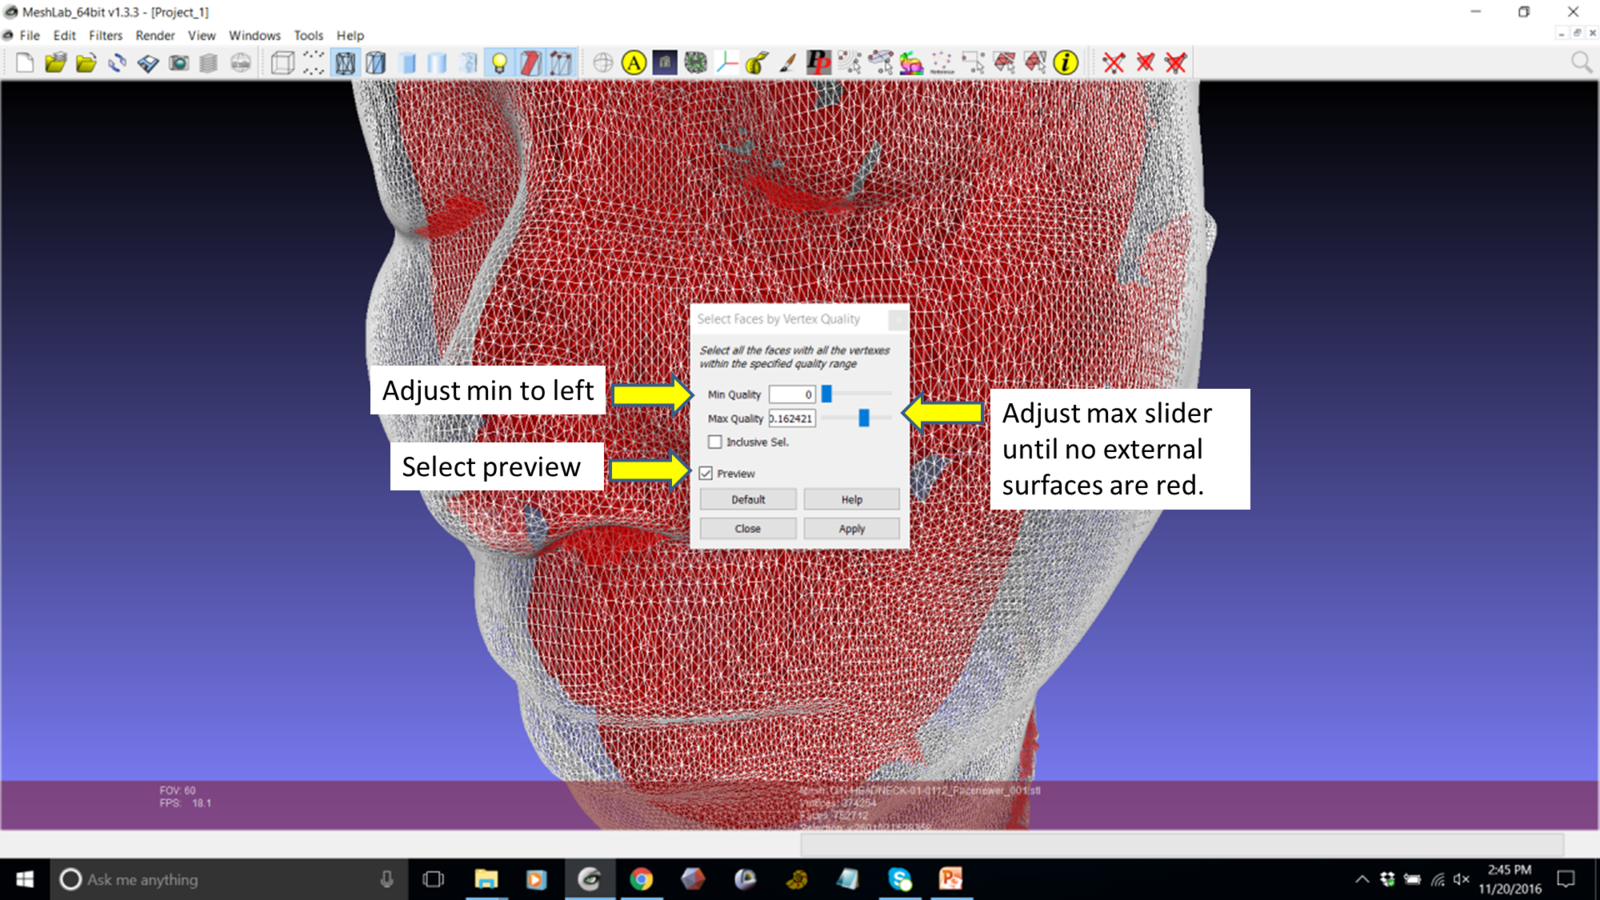
When the Selection box opens up, slide the "Min Quality" value all the way to 0 (to the left). Check the "Preview" box so that you can see which areas are selected in red.
Adjust the "Max Quality" slider left and right until you see that no external surfaces are selected in red. In the image below, you can see that the bottom edges of the eyelids are still red and some skin below the nostrils is also red. When you find a good value, click "Apply" and Close.
**Depending on the model, it may be difficult to adjust the Max slider to a value that doesn't include parts of the eyelids or nose, but I will explain in Step 6 how you can recover these features. Instead of deleting the selection in Step 5, skip to Step 6.
Step 5:
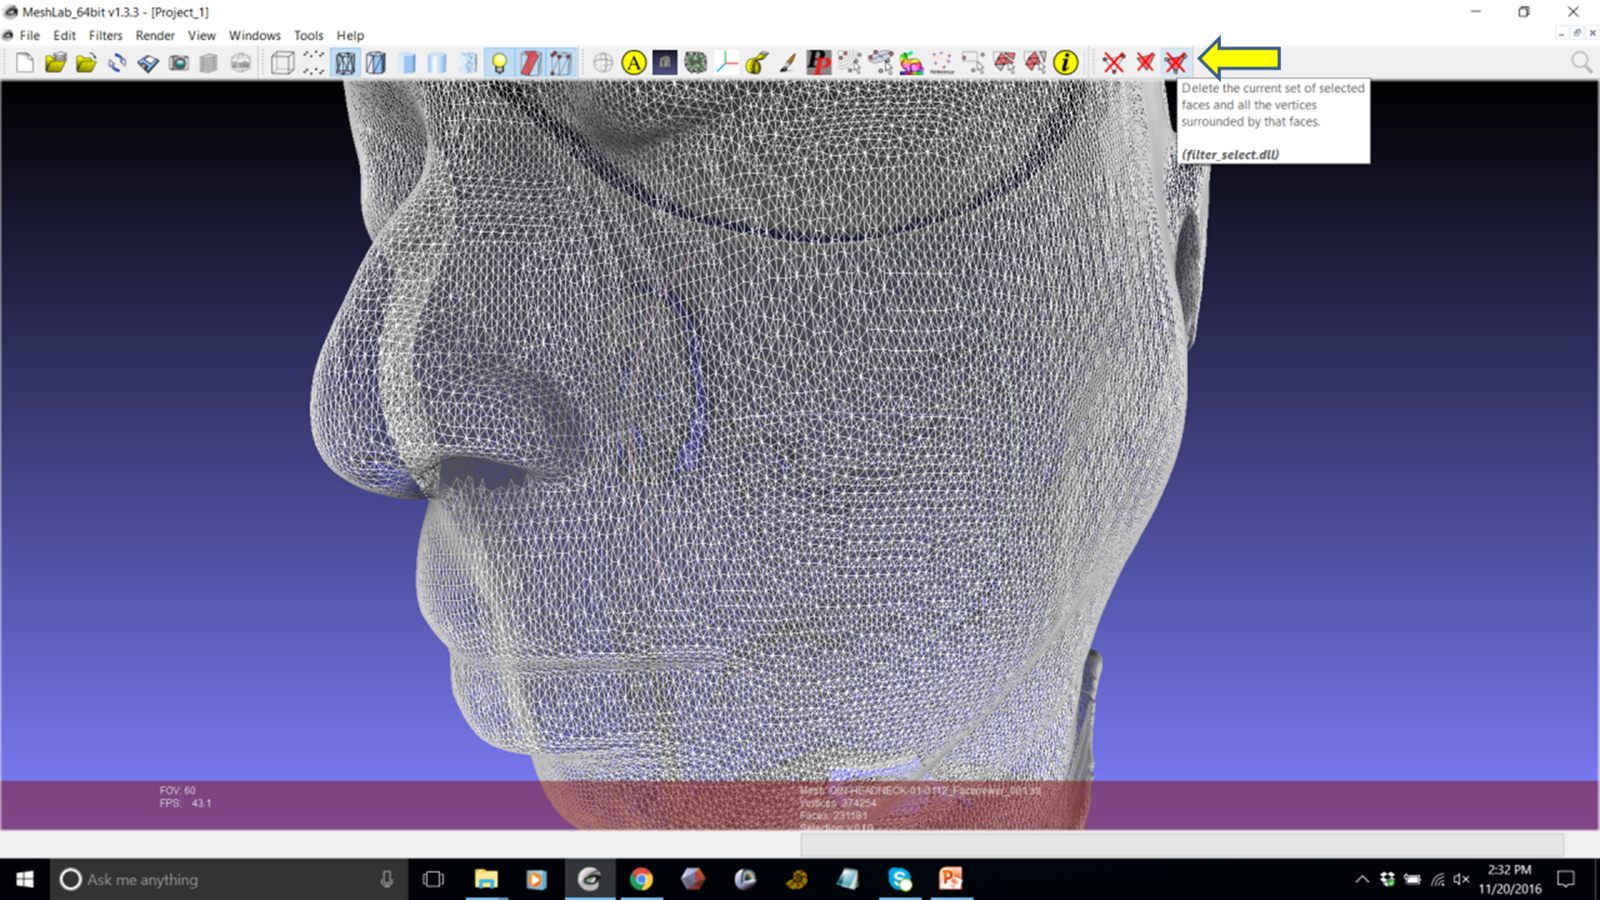
Once you are happy with your selection from Step 4, you can delete everything selected in red by clicking the button shown in the image below. You can see that the model is now hollow, although there may be some disconnected pieces which we will remove in multiple cleaning steps.
Step 6:
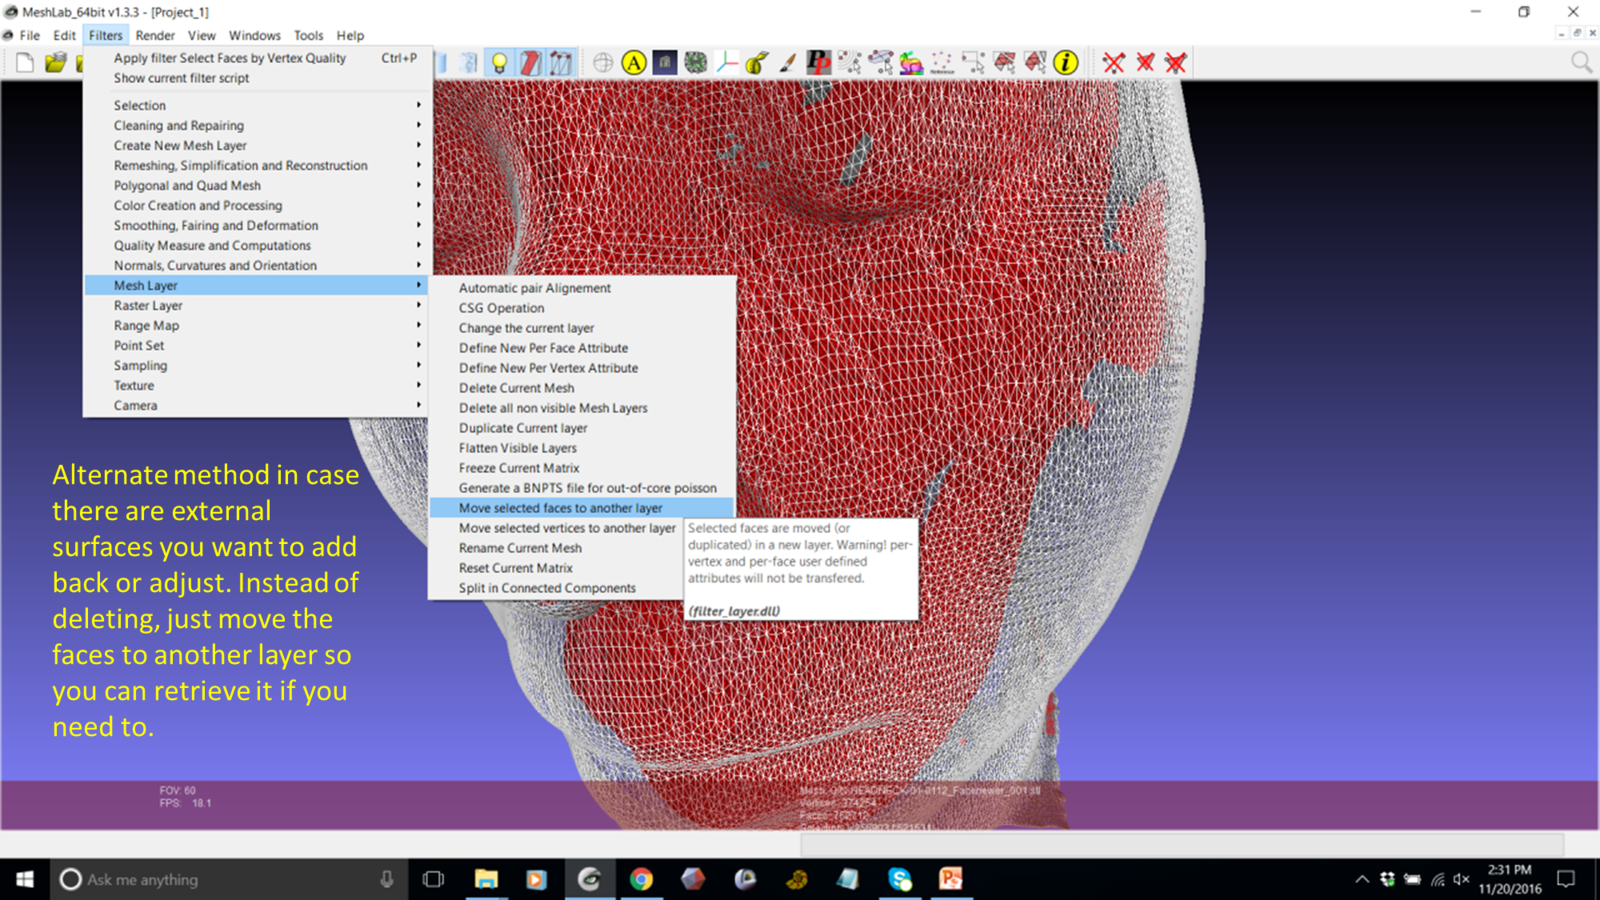
If you think you may have selected some external features in Step 4 that you don't want deleted, instead of deleting (Step 5), you can move the selected (red) areas to another layer. Sometimes with overhanging eyelids or very deeply set eyes, these areas might have the same shading values as some internal structures and can't be excluded from the red.
Go to Filters --> Mesh Layer --> Move selected faces to another layer (if your layer dialog is already open, you can right-click on the model name to access the Mesh Layer menu as well). The layer dialog will open up on the right and you will see the name of your original model as well as the new layer. Use the eye icons to toggle visibility.
The Meshlab selection tools can be used to select the areas from the red you want to keep, then move them to another layer. Right-clicking on a mesh name will open the Mesh Layer menu, from which you can "Flatten Visible Layers"--the layers you want to keep can be kept visible and merged into a new mesh.
Step 7:
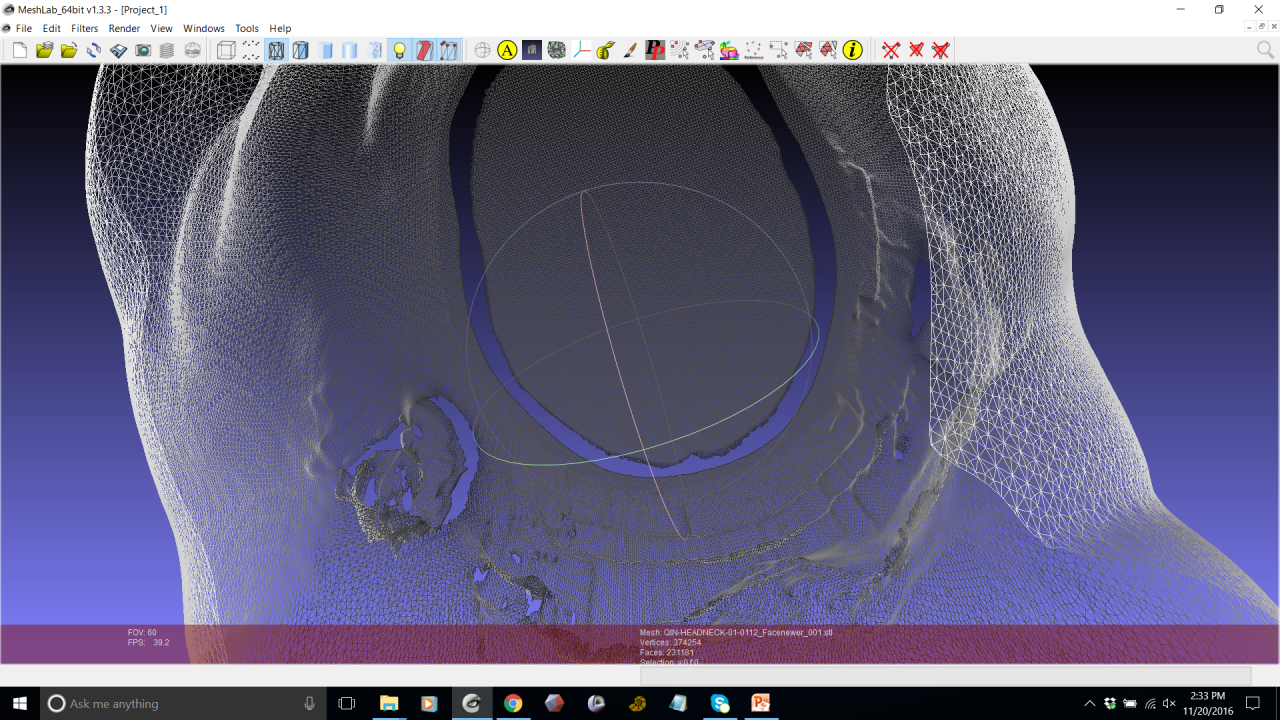
This image shows the view from the bottom. The head is empty except for that big flat piece at the top of the head.
Step 8:
As an initial cleaning step to remove small pieces, go to Filters --> Cleaning and Repairing --> Remove Isolated pieces (wrt Diameter). The default size works well, but you can adjust it up to 40% or so to remove larger pieces. This is a deletion function, so the floating pieces will be removed and gone forever! Try to not to adjust the size too high--we'll remove large pieces in step 9.

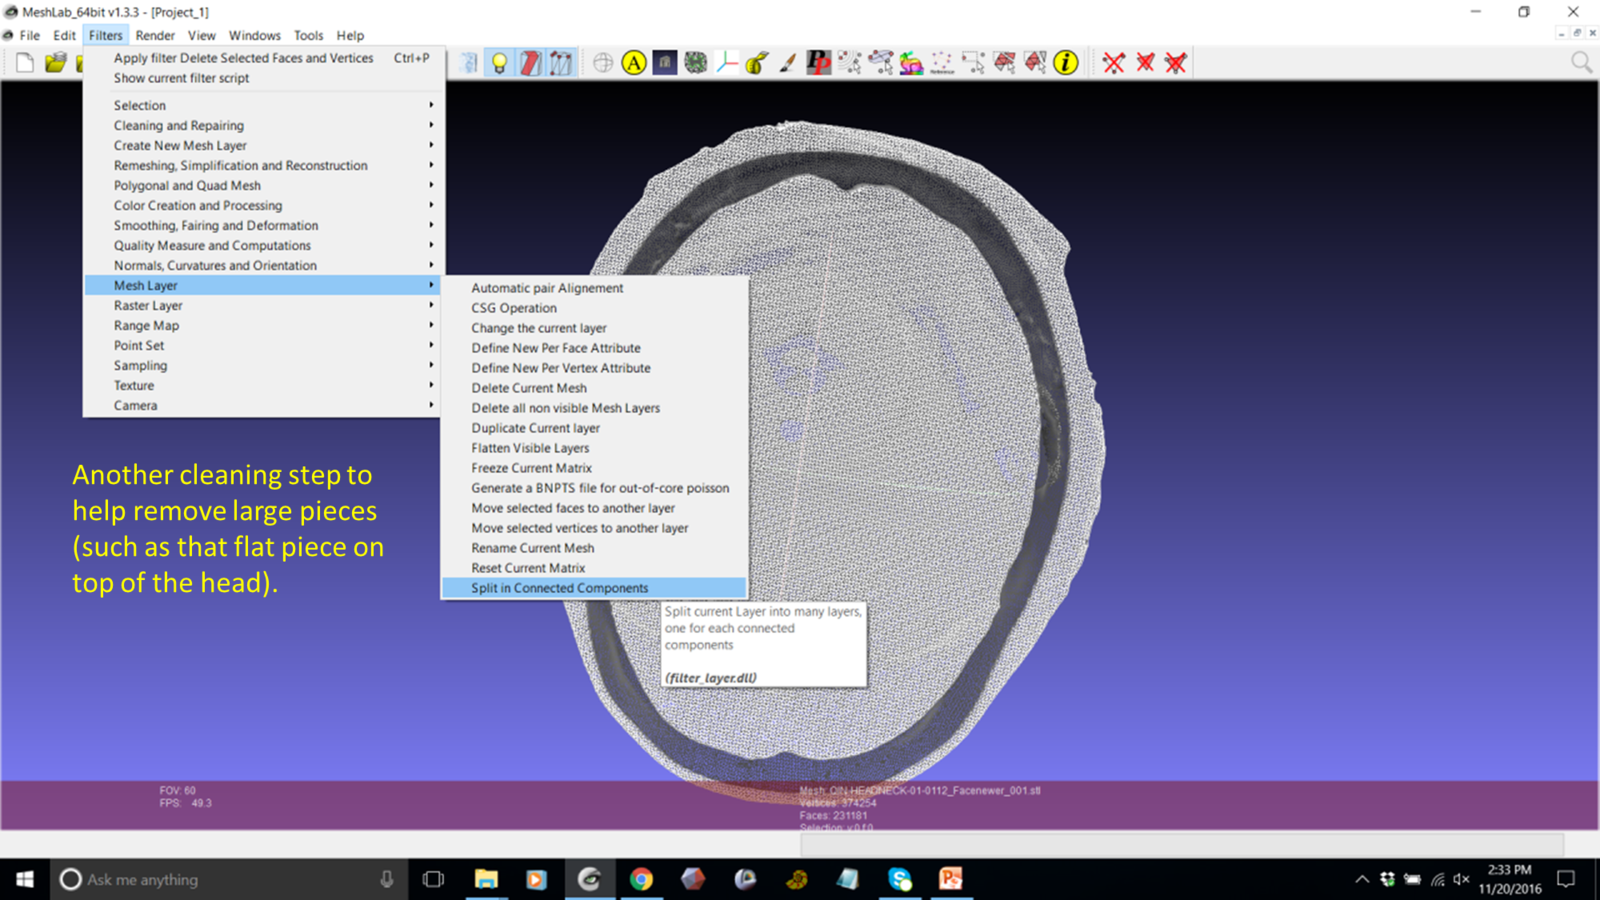
Step 9:
Step 8 will usually not remove large pieces, especially if you're being cautious and only remove small pieces. To remove larger pieces, go to Filters --> Mesh Layer --> Split in Connected Components. The pieces will drop into separate layers in the layer dialog box on the right, and they will be named CC 0, CC 1, etc. You don't want to apply this filter until you've removed small pieces, or you might end up crashing the program because there are too many pieces separating out! As mentioned above, the Mesh Layer menu can also be accessed by right-clicking on the mesh name in the right-hand layer dialog box.
Step 10:
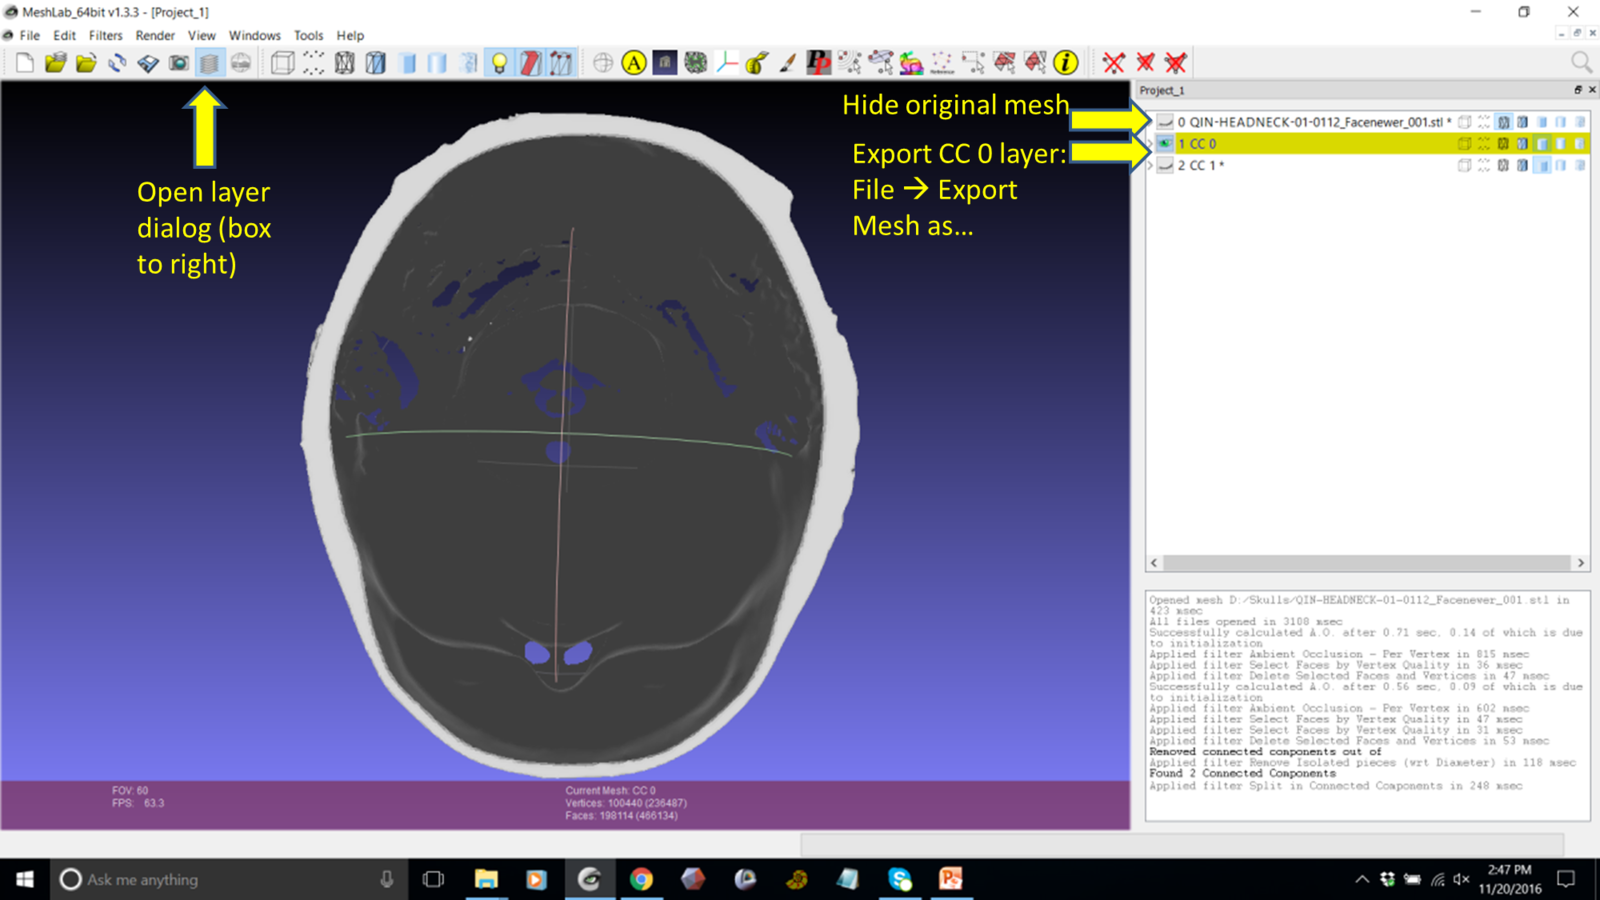
The largest layer is usually CC 0. Toggle visibility to figure out which layer is the one you want. Left-click on it to highlight it in yellow and then export using File --> Export Mesh as...
I prefer to fill holes (Inspector) and create internal walls (Extrude or Offset) in Meshmixer, so you can now import the hollowed model to Meshmixer to fix it up for printing if needed. You can also use the plane cut tool in Meshmixer to remove the flattened edge at the top of the skin model, or apply Ambient Occlusion again in only the z-direction (see Step 1--"Lighting Direction").
This can be an interative process depending on the complexity of the model you're trying to hollow, but it can save on printing time as well as $$ if you're only interested in the external surface. Play around with lighting directions to select the surfaces you want and as always, SAVE meshes along the way in case the program crashes or you make a mistake!


0 Comments
Recommended Comments
There are no comments to display.
Create an account or sign in to comment
You need to be a member in order to leave a comment
Create an account
Sign up for a new account in our community. It's easy!
Register a new accountSign in
Already have an account? Sign in here.
Sign In Now