
Why do we need this? This is usually the first response you will get when asking to buy a 3D Printer. What are the benefits? Return on Investment? To show the benefits of having this capability in your center here is a look at one of the many cases I have our used our 3D Printers to create custom piece's and improve realism in our simulation scenarios.
As users of High-Fidelity Manikin's we all know these manikins are capable of replicating human patients with high realism. Unfortunately there are some limitations when using this equipment. Some limitations can cause a simulation scenario to go down a different route from what was intended.
Problem:
Some simulation's require the scenario to be Can't Intubate, Can Ventilate, the goal being the physician using a specific algorithm for treatment. However I was finding that even with the difficult airways features turned on (laryngospasm, pharyngeal swelling, and tongue swelling) the physicians were able to pass the ET tube into the trachea with little resistance (video 1) *Disclaimer* There is resistance when attempting to pass the tube through the vocal cords, passing the tube with resistance would not take place in a clinical setting, however it does happen in simulation.
Solution 1:
I attempted to find solutions to implement in addition to using the manikin features that could improve the realism and prevent intubation. The first solution involved making changes to the ET Tube. I cut the cuff (preventing a seal from being obtained). This solution did not work as it required opening the packaging of the supplies, and trying to prevent the staff from testing the cuff prior to intubation. Even with the modifications the physician was still able to pass the tube through into the trachea.
Solution 2:
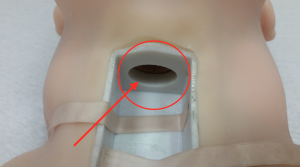
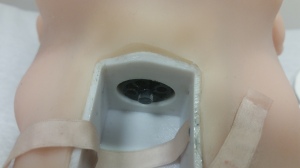
I decided to create a custom 3D printed piece that would prevent the tube from being passed. The manikin has a removable surgical airway that once removed exposes an opening behind the vocal cords (Figure 1).
The opening would allow a 3D printed piece to fit perfectly without interfering with any of the manikin features. Using digital calipers i measured the diameter of the opening as well length to the vocal cords.
Design:
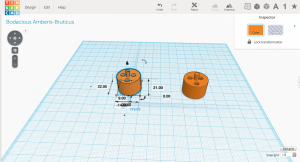
There were multiple programs i could use to design the prototype, TinkerCAD, 123D, or Fusion360. I started creating a rough design in TinkerCAD, as it is web-based and simple to use. Using TinkerCAD did have some limitations and my first print failed due to the walls being too thin.
My next attempt was using Fusion360. As with any prototype you will go through several designs before reaching the final one. Using Fusion360 provided me with greater control and more options for creating the prototype. Using the dimensions from TinkerCAD, I was able to easily create the prototype (see Video 2). The prototype has four holes that allow air to pass. Also included is a solid tube extending out to allow from the piece to be removed with forceps.
Printing:
For the 3D print I decided to use the Formlabs 1+ SLA printer. My reasons for choosing this printer over the other 3D printers was for several reasons. First I wanted the prototype to be clear, second i wanted a flexible material that could be compressed to insure an airtight seal. And last using the Formlabs software allowed me to only have to select the material I wanted to use, all settings are changed automatically. If I used one of the other printers I would need to change multiple values manually to use a flexible filament. I have great results using the Formlabs printer, and I knew the prototype would be good quality. The print settings were:
Material: Flexible Resin v1
Layer Thickness: 0.1mm
Volume: 5.99mL
Print Time: 59 minutes
Total Cost: $1.80/per print
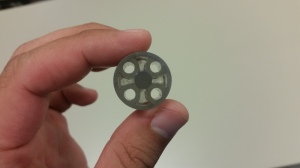 Blockage Prototype-Printed on Formlabs 1+
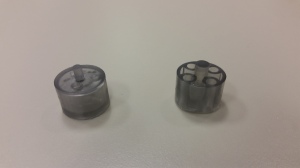 (Left) TinkerCAD Design, (Right) Fusion360 Design
Testing the Prototype: To test the prototype. I inserted the piece into the surgical airway opening with the flat base facing the vocal cords. I attempted to intubate the manikin (video 3). The ET tube was not able to pass the vocal cords regardless of the amount of force applied. The prototype fit snuggly in the surgical airway opening (figure 2) providing normal manikin function without any restrictions.
Conclusion: The 3D Printed prototype functioned well during testing and during the simulation scenario's. The simple, low-cost design is achievable by using a 3D printer. The piece can be further modified to be used in a simulation that requires Can't Intubate, Can't Ventilate. Since there are 6 high-fidelity manikins in our center, all the manikins can be fitted with the piece for $10.80. There are countless ways to use a 3D printer in your center, this was just one example of the benefits the 3D printer can bring.
Written by David Escobar
Need Training? Contact me at david@3DAdvantage.org
Please check out my site for more information 3DAdvantage.org



0 Comments
Recommended Comments
There are no comments to display.
Create an account or sign in to comment
You need to be a member in order to leave a comment
Create an account
Sign up for a new account in our community. It's easy!
Register a new accountSign in
Already have an account? Sign in here.
Sign In Now